Walkthrough - Pripyat Quests STALKER: CoP Guide
Last update: 11 May 2016
1. Unidentified Weapon / Gauss Rifle
Received from: Kovalsky, automatically upon reaching the Pripyat sector
Beginning location: point 1 on the map
Target location: point 2 on the map
Mission description:
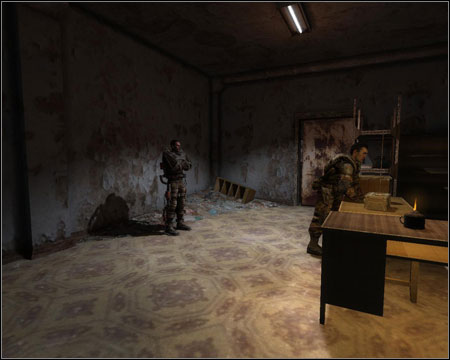
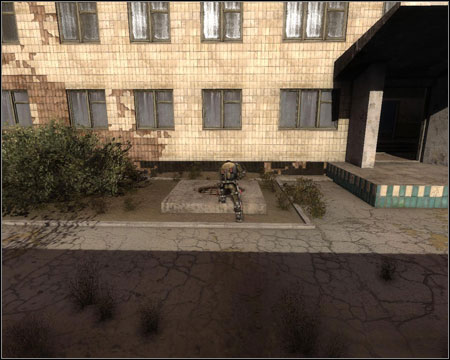
Kovalsky will order you gain hold of an unidentified weapon. Begin from going to the ground floor (stairs leading down at the white point). In case you're in need, the mechanic (point 3 on the map) will give you ammo and repair your equipment for free (you can even ask him for armour). The medic (point 4 on the map) is also willing to serve you free of charge. Tarasov (point 2 on the map - screen) will take you and his squad to the hospital, where the mission itself will begin.

You move to point 5. Follow the soldier marked on the minimap and take a shooting position on the floor of the western wing of the hospital (point 6). Don't lean out, as the enemy can easily spot you. Once the soldiers standing next you (screen) says that the squad is ready to attack on your sign - take out one of the enemy soldiers on the square.

Wait and ignore the order to search the bodies on the square. Don't move from your position. After a while it will turn out that it's a trap and enemy soldiers will enter from the eastern wing. Concentrate on the talkative leader (shoot after he raises his hands), who has settled himself on the roof on the left (screen) with the gun you're searching for.

Kill him as fast as possible, as his attacks are incredibly accurate and effective. Afterwards you have to get rid of the rest of the soldiers and take the gun their leader has been using. At point 7 you will find a stairway which will lead you to the first floor (screen). Give the gun to your employer and watch the scene which will begin another mission.
Phase 2 - repairing the gun
Target location: point 8 on the Pripyat map, points 4, 30 on the Zaton map
You have to get to Zaton. Talk with Garry - the guide who just arrived at the sector (point 8). If you have helped Garry during mission 11 (A contract with the Scientists) of the Jupiter sector, he will give you a quite rare artifact - Bubble. Show the broken gun to Cardan - the mechanic of Zaton sector (point 4). He will fall asleep, so go take a long nap yourself. Once you talk to him again, he'll give an access key to the underground laboratory (point 30 - screen).

Go down the stairs, take care of the zombies in the corridor and reach more stairs going down. To the right of the stairs there's a door to the next room. Save your game, as you will have to face a powerful enemy. The two-legged mutant is luckily too wide to fit into the door, so go back each time he approaches you. Go up the stairs and then up the ladder. Go along the metal walkway to the other side of the room (south-west), find the ventilation shaft (screen) and enter it. It will lead you directly to the document you're searching for. Now return to the mechanic, who will repair the Gauss Rifle in a couple hours. You will also be able to buy ammo from him (6 bullets for 2 000).

Phase 3 - Kovalsky
Return to Pripyat (the pilot in the Stalker base in Zaton can now take you there for 4 000). Once you're there, Garry will tell you about the mercenaries who he has led to the sector recently. After hearing the story out, report to the Colonel and tell him about the Gauss.
2. Helping Zulu
Received from: automatically upon reaching point 11
Beginning location: -
Target location: point 11 on the map
Mission description:
This is not a mission viewable from the PDA. If Zulu survived the journey to Pripyat, you will find him at point 11, surrounded by mutants. Help him in the fight (screen) and in return he'll give you his heavy machine gun in the base.

3. Missing Recon Unit
Received from: automatically after mission 1
Beginning location: point 1 on the map
Target location: point 12 on the map
Mission description:
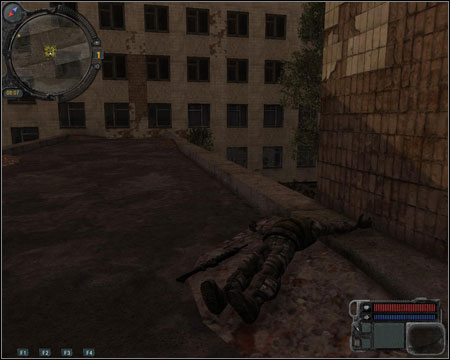
There's a corpse at point 12 (screen). Watch the cutscene, after which the mission will be split into two separate, new tasks.

4. Monolith Forces
Received from: automatically after mission 3
Beginning location: point 12 on the map
Target location: point 13 on the map
Head to the meeting point of your team (minimap), by the bus. If Sokolov and Vano survived the journey to Pripyat, they will join us in this mission (you have to wait for them in the marked place). Your target is the library occupied by enemy soldiers (point 13). There are five enemies in the room which you will enter. One buddy with a rifle in the west corridor and the second one on the right. You should now be standing by a double door (screen).

After breaching the room, you shouldn't have problems with getting rid of the five praying enemies. Take a look at the strange construction in the middle and a cutscene will play, ending the mission.

5. Missing Sentry
Received from: automatically after mission 3
Beginning location: point 12 on the map
Target location: point 14 on the map
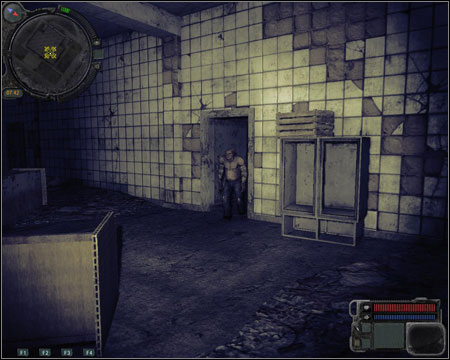
You have to find the missing sentry. Go to the building at point 14. Watch the strange behaviour of the sentry and eventually his suicide. Prepare a grenade launcher or a powerful rifle. Soon enough a mutant will enter through the door (screen). Don't keep eye contact with him (you've met this type already, while working for the scientists in Jupiter sector). Killing the mutant will launch a cutscene which will end the mission.
6. One Shot
Received from: Kovalsky, after finishing mission 1 and talking with Garry about the mercenaries
Beginning location: point 1 on the map
Target location: points 15, 16 on the map
Remind the Colonel about the incident with Garry. During the conversation, mention the laptop from mission 6 (Mercenary Camp) of Zaton sector and Uncle Yar from mission 5 (Kopachy) of Jupiter sector. You have to choose your target - either take down the client with whom the mercenaries are to meet or their leader. Your choice however, doesn't change much, so kill both. After the conversation, you will be automatically taken to point 15, where the mission will take place and will receive a sniper rifle with ammo (but Gauss also works fine here). Wait for the mercenary leader (egzoskeleton) to walk to the middle of the square (point 16). A client in a suit (without a weapon) will join him. Kill them both. The other mercenaries aren't important so quickly go away from the window and dodge an RPG missile. You should find a red access key in the body of the client. You can now return to the base and report.

7. Laboratory X8
Received from: automatically after mission 1
Beginning location: point 1 on the map
Target location: points 17-20 on the map
Mission description:
You have to get to the underground of the building at point 17. Begin from restoring the power and starting the elevator (it will turn out that it doesn't work). You will have to use 4 staircases, marked 17 to 20 on the map. First floor - 17. Look out for zombies and enemy soldiers, who will be present at every single floor from now on. Second - 18; Third - 20. Fourth - 19. Fifth - 17. Locate the generator at the point marked on the minimap (screen) and start it up. You can also go to the roof, full of electric anomalies and collect an artifact. Return to the elevator and go down to the laboratory which has been described in a different chapter of this guide.

8. A Quiet Word
Received from: automatically after finishing mission 7
Beginning location: point 17 on the map
Target location: point 1 on the map
Mission description:
After leaving the laboratory, you will be called by Colonel Kovalsky. Enter his room and a cutscene will be played.
9. Radio Interference
Received from: automatically after mission 8
Beginning location: point 1 on the map
Target location: points 21, 22, 3 on the map
Mission description:
Notice - after finishing this mission, Garry will disappear and will return only after you complete mission 11 (Evacuation). Until then, you won't be able to leave Pripyat. If you have anything to take care of in the other sectors (upgrading your equipment, buying Gauss ammo), you better do it now.
Head to the marked spot and search the body. Take the explosives and watch a cutscene. Head to the building at point 22. Plant the charge on the door (screen) and move back to a safe distance. Once on the floor, a living anomaly will jump out on you from the room marked with a red point, you can kill it.

At the white point, go down the stairs. Blue marks stairs leading up. Find the source of the interference at the point marked on the map (screen) and get rid of it by destroying the planks. Jump through the hole and open the green fridge from which knocking can be heard. Return with the rescued soldier to the base. Now you have to talk with the Colonel. You will find him in the spot where the mechanic has been staying (point 3).

10. Unknown
Received from: automatically after mission 9
Beginning location: point 3 on the map
Target location: points 23, 16 on the map
Mission description:
Point 23 should interest you. Once you're there, the signal will move to point 16, where it will disappear. Approach the location and watch a cutscene (screen). Now you have to return to the soldiers' base, which will end the mission.
11. Evacuation
Received from: automatically after mission 10
Beginning location: point 3 on the map
Target location: points 24, 25, 26 on the map
Mission description:
Begin with waiting for the emission to end. Afterwards watch a cutscene and talk with the Colonel. He will order you to collect supplies from the mechanic and medic. Once you're ready (prepare lots and lots of ammo), talk with him again. This will begin a quite chaotic evacuation (screen) during which your task is to protect Strelok, who's marked on the map.

Your main enemies will be zombies attacking from every possible direction. From point 24 onward, your main enemies will be the jumping mutants. At point 25 you will stop for a while and experience hallucination. You have to hurry up the medic who's behind. You have to reach the choppers (point 26 - screen), while successively eliminating the enemies and then hold your position.

The last choice you will have to make is to leave the zone - you can stay if you want. The things you will see during the ending cutscene depend on your choices made during the game and who of your friends is still alive.