
Mission 9 - Koepenick Launch Site Sniper Elite V2 Guide
Last update: 11 May 2016
Wine Bottles | Gold Bars | Weapon unlocked |
3 | 10 | - |

Objective 1: Find the trenches

Right after the mission begins, equip the silenced pistol and get rid of the soldier in front of you (you can also finish off the dying one).

Take out the sniper rifle again - you will be using it for the most time from now on. With the sound of the thunder, kill the enemy in the distance. Move a bit forward - on the right side you should note a searchlight - destroy it with the next thunderstruck.

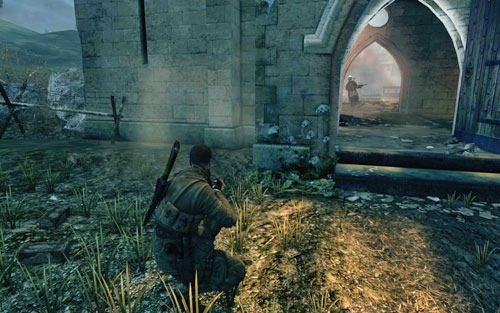
Between the ruins, there are four or five more soldiers. Reach the corner of one of the ruins and lean towards the road - in the distance you should note two or three - depending on whether one of them has appeared somewhere before.
![Continue onwards very slowly, towards the marked point [#1] - Mission 9 - Koepenick Launch Site - Walkthrough - Sniper Elite V2 Game Guide & Walkthrough](/sniperelitev2/gfx/word/126903187.jpg)
Continue onwards very slowly, towards the marked point [#1]. You should however look out for the four machine gun posts. This part is made difficult by the fact that the killed soldiers get replaced by new ones. Luckily there's a limited number of them, so after reaching the above spot you should stop for a bit and kill them until there's no one left.
Once you're certain you've killed everyone, head into the church - there are two enemies inside. Start eliminating them by killing the one closer to the door and then move on to the officer (it's best to kill them both during one thunderstruck).
| Gold Bar! 1/10 - Below the church bench. |

| Gold Bar! 2/10 - On the top of the church. |

Before heading to the trenches, you should examine the cleared area for gold bars.
| Gold Bar! 3/10 - Behind the truck beside the starting point |

| Gold Bar! 4/10 - Inside one of the ruins. |

| Gold Bar! 5/10 - Beside the barbed wire before the trenches. |

| Wine Bottle! 1/3 - In one of the windows at the top of the church. |

Objective 2: Find the V2 launch site
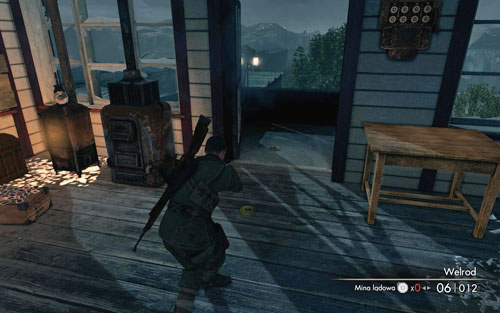
![From the church, head to the marked spot where you can crawl into the trenches [#2] - Mission 9 - Koepenick Launch Site - Walkthrough - Sniper Elite V2 Game Guide & Walkthrough](/sniperelitev2/gfx/word/126903312.jpg)
From the church, head to the marked spot where you can crawl into the trenches [#2]. On the other wise, you can start off by silently killing the soldier. At this point you can choose between a longer path - on which you will come across a few enemies - and a shortcut.
| Gold Bar! 6/10 - Beside the last machine gun post. |

| Gold Bar! 7/10 - Inside a dead end, on the road to the trenches exit (longer path). |

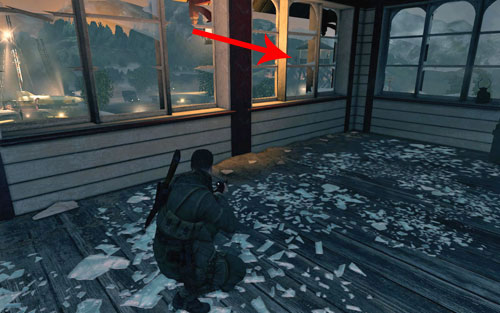
![If you choose the shortcut, head towards point [#3] on the map, i - Mission 9 - Koepenick Launch Site - Walkthrough - Sniper Elite V2 Game Guide & Walkthrough](/sniperelitev2/gfx/word/126903359.jpg)
If you choose the shortcut, head towards point [#3] on the map, i.e. crawl further and eliminate the officer standing inside the room.
| Gold Bar! 8/10 - Right beside the desk in one of the bunkers, where the officer was. |

| Wine Bottle! 2/3 - On the crates inside the next room. |


Move on, heading up towards the trenches exit. On your way you should come across two more soldiers who are walking there. After you reach the tent [#4], go prone as fast as possible - a sniper will appear on the church tower.
Objective 3: Eliminate the launch site officer
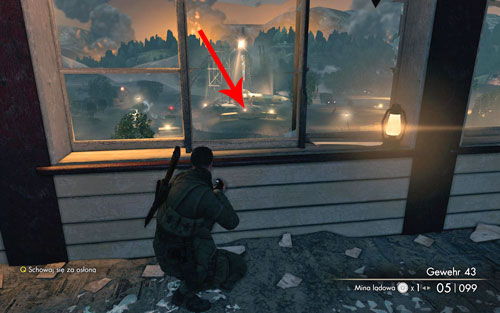
![Head up towards the car, with which you will reach the proper part of the compound [#5] - Mission 9 - Koepenick Launch Site - Walkthrough - Sniper Elite V2 Game Guide & Walkthrough](/sniperelitev2/gfx/word/126903421.jpg)
Head up towards the car, with which you will reach the proper part of the compound [#5]. Very slowly move to the control building [#6], inside which you will find the launch site officer - eliminate him and a second soldier as well. Inside you will find some ammo crates - another one in the basement and a fourth one upstairs.
| Gold Bar! 9/10 - Between the cars. |

Objective 4: Hold you position, as the missile fuel tank is filled
Head upstairs - before attacking, you should place some charges and mines by the doors on both sides. In the further part, try to control whether someone has tried reaching you, placing new traps on a regular basis if needed.
| Gold Bar! 10/10 - In the corner of the upstairs room. |

| Wine Bottle! 3/3 - On the scaffolding beside the rocket. |

It's good to begin with killing the sniper on the tower on the right, as he's the biggest threat. As the alarm sets off, the rocket's fuel tank will also start to be filled. Your objective is surviving until the tank is full.
One of the equally important places on the map is the sniper post directly across - sometimes you might be able to spot an enemy heading that way and you shouldn't let him reach it.

After a rather long fight, you will hear a countdown start - it's a sign that the fuelling process has ended and the rocket is ready to be launched. You will have to destroy it by shooting its tank [#7] - it's a rather big red point on the rocket. With the explosion of the rocket, the mission will end.