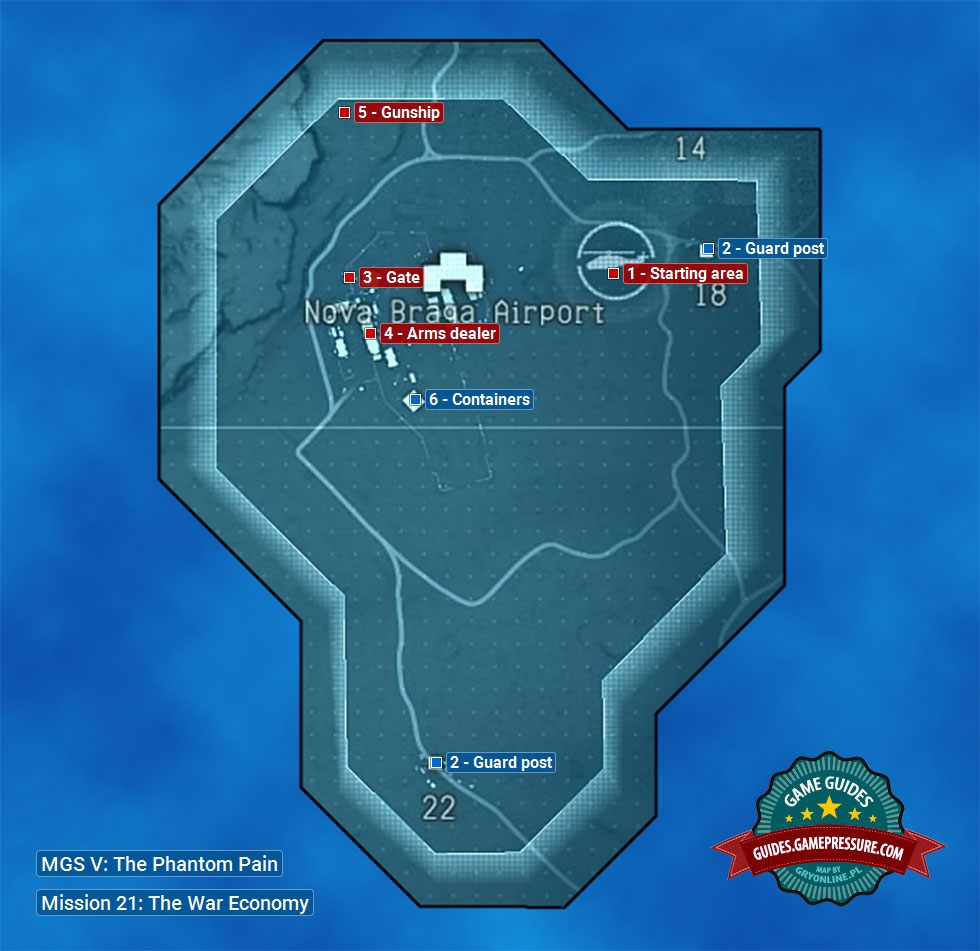
The War Economy - mission map | Walkthrough MGS V: TPP Guide
Last update: 14 April 2017
Key points of MGS V: The Phantom Pain - Mission 21: The War Economy
Important areas on the map
Additional areas on the map
Important areas on the map
1 - Starting area � The only available landing zone where you can begin your mission.
Additional areas on the map
2 - Guard post � You can avoid the guard posts or secure them.
Important areas on the map
3 - Gate � Suggested way to enter the airport (a gate which needs to be opened). Once you've used this passageway head south to the building with the arms dealer (4 on the map).
4 - Arms dealer � The arms dealer can be found on the first floor of the building. Later on in the mission a CFA official will arrive here via a chopper (5 on the map).
You can listen in to the conversation between the arms dealer and the CFA official when they're visiting different parts of the airport. You can also stun and exfiltrate both of them (they're all additional mission objectives).
5 - Gunship � A gunship with a CFA official on board will appear in this part of the map and its destination is the airfield's main building (4 on the map). You can take down the gunship when it's still in the air and eliminate the CFA official that way (main objective) or you can wait for it to land and either stun him or wait for him to meet with the arms dealer (optional objectives).
The gunship itself should be shot down sooner or later, because you'll obtain a blueprint as a result of that (hidden mission objective).
Additional areas on the map
6 - Containers � The containers are in the hangar and one of the hidden mission objectives is about extracting them. You can't do that until you've unlocked the Wormhole upgrade for the fultoning device.
The map presented above shows the area you are going to explore during the 21st main Metal Gear Solid V mission named The War Economy. Head to Nova Braga Airport right after beginning of the mission and choose the northwest gate (number 3 on the map) to get inside. After that go to the main building (number 4) and decide if you want to kill the main targets or do you prefer to knock them down and fulton them away. You shall visit the hangar (number 6) only when you try to repeat this mission and you have the Wormhole upgrade.

