Guides & Walkthroughs New Guides Popular RPG Action Strategy Adventure YouTube Guides Mobile App
Free iOS App iPhone & Ipad
Download Game Guide PDF, ePUB & iBooks

LEGO The Lord of the Rings Game Guide & Walkthrough by gamepressure.com

LEGO The Lord of the Rings Game Guide & Walkthrough

Table of Contents

The Pass of Caradhras | Collectibles LEGO LotR Guide

Last update: 11 May 2016

Minikit #1

You will have to once again destroy a couple items during the mission. This time it will be skeletons with bronze helms.

#1 - To the left of the starting point

#2 - Inside a cave in which you need to push down a rock - The Pass of Caradhras - Collectibles - LEGO The Lord of the Rings - Game Guide and Walkthrough

#2 - Inside a cave in which you need to push down a rock

#3 - At the back of the first camp, right beside a tent - The Pass of Caradhras - Collectibles - LEGO The Lord of the Rings - Game Guide and Walkthrough

#3 - At the back of the first camp, right beside a tent

#4 - Directly behind the location in which you obtain Minikit #3 - The Pass of Caradhras - Collectibles - LEGO The Lord of the Rings - Game Guide and Walkthrough

#4 - Directly behind the location in which you obtain Minikit #3

#5 - Beyond the avalanche, after crossing the deep snow and building a narrow tunnel - The Pass of Caradhras - Collectibles - LEGO The Lord of the Rings - Game Guide and Walkthrough

#5 - Beyond the avalanche, after crossing the deep snow and building a narrow tunnel. It can be found in the left part of the cave.

You will need to hit a few things here as well - The Pass of Caradhras - Collectibles - LEGO The Lord of the Rings - Game Guide and Walkthrough

Minikit #2

You will need to hit a few things here as well. This time they will be pennants.

#1 - After crossing the second deep snow part

#2 - After going past the first camp and collecting your team, you will have to head left along the wall - The Pass of Caradhras - Collectibles - LEGO The Lord of the Rings - Game Guide and Walkthrough

#2 - After going past the first camp and collecting your team, you will have to head left along the wall

#3 - During the avalanche - The Pass of Caradhras - Collectibles - LEGO The Lord of the Rings - Game Guide and Walkthrough

#3 - During the avalanche; just move closer to the camera

#4 - After crossing the bridge, avoid the strong winds and instead of going up the stairs, move closer to the camera - The Pass of Caradhras - Collectibles - LEGO The Lord of the Rings - Game Guide and Walkthrough

#4 - After crossing the bridge, avoid the strong winds and instead of going up the stairs, move closer to the camera.

Needed: axe, bow - The Pass of Caradhras - Collectibles - LEGO The Lord of the Rings - Game Guide and Walkthrough

Minikit #3

Needed: axe, bow

Build a ballista, cross the line with Legolas and head to the right - The Pass of Caradhras - Collectibles - LEGO The Lord of the Rings - Game Guide and Walkthrough

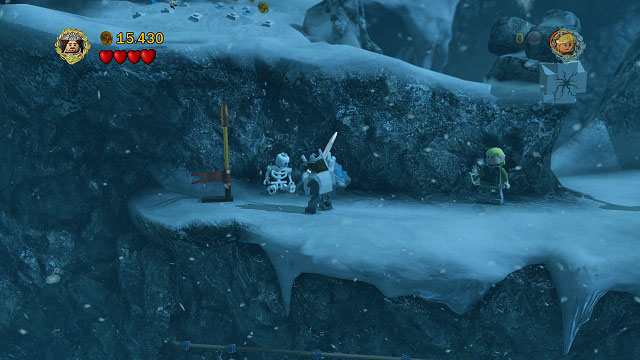
Build a ballista, cross the line with Legolas and head to the right. There Gimli should break a cracked brick and create a snowman, while Legolas shoot it with his bow.

Minikit #4

Needed: explosive

After passing by the avalanche, you will find mithril rocks by the wall - The Pass of Caradhras - Collectibles - LEGO The Lord of the Rings - Game Guide and Walkthrough

After passing by the avalanche, you will find mithril rocks by the wall. Blow them up with the Berserker's bombs.

Minikit #5

Needed: elven rope, strength

A bit behind the avalanche, after jumping across the gulf, you should see a hook on the wall - The Pass of Caradhras - Collectibles - LEGO The Lord of the Rings - Game Guide and Walkthrough

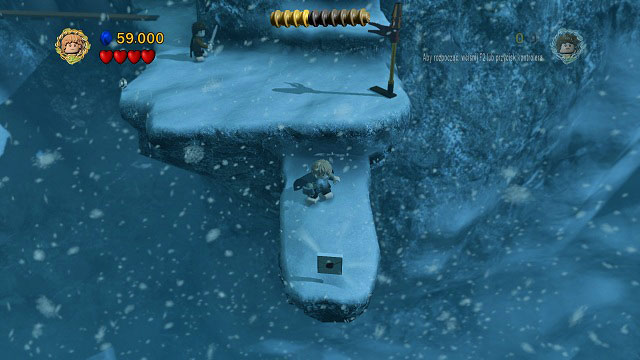
A bit behind the avalanche, after jumping across the gulf, you should see a hook on the wall. You need to climb up and change your character to Shagrat there.

Minikit #6

Needed: explosive, phial

In the area where you get inside a narrow tunnel with Sam to dig up boards for a bridge - The Pass of Caradhras - Collectibles - LEGO The Lord of the Rings - Game Guide and Walkthrough

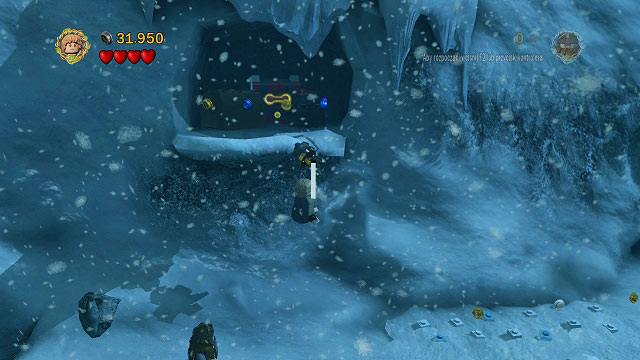
In the area where you get inside a narrow tunnel with Sam to dig up boards for a bridge. In the background you should see a cave blocked by mithril boards - blow up the obstacle and head inside while holding the Phial of Galadriel.

Design: Mithril Cluster Bow

After crossing the bridge, avoid the strong winds and instead of going up the stairs, move towards the camera - The Pass of Caradhras - Collectibles - LEGO The Lord of the Rings - Game Guide and Walkthrough

After crossing the bridge, avoid the strong winds and instead of going up the stairs, move towards the camera. It can be found beside pennant #4.

Treasure: Bill's Riding Crop

Needed: sword

Destroy the nearby LEGO Morgul bricks and break the rock in the cave - The Pass of Caradhras - Collectibles - LEGO The Lord of the Rings - Game Guide and Walkthrough

Destroy the nearby LEGO Morgul bricks and break the rock in the cave. Now just pick up the treasure.
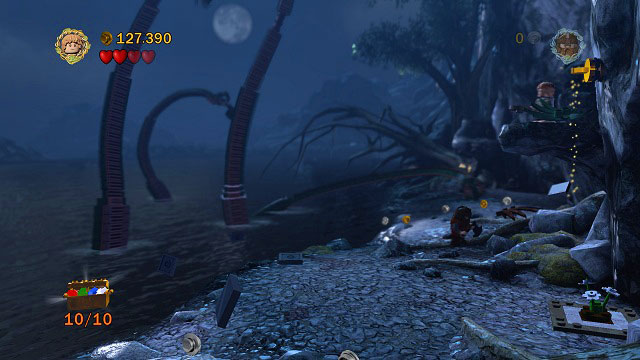
Minikit #7

You need to get on a horse and move along the trail of coins - The Pass of Caradhras - Collectibles - LEGO The Lord of the Rings - Game Guide and Walkthrough

You need to get on a horse and move along the trail of coins. At its end you will find a chest.

Treasure: Luminous Stone

Needed: explosive, Aragorn

In the left part of the location you will find a mithril rock which can be destroyed with the Berserker's bomb - The Pass of Caradhras - Collectibles - LEGO The Lord of the Rings - Game Guide and Walkthrough

In the left part of the location you will find a mithril rock which can be destroyed with the Berserker's bomb. Pick up the item with Aragorn and head along the green trails.

You will need to do it three times and at the end you should find the treasure you're looking for - The Pass of Caradhras - Collectibles - LEGO The Lord of the Rings - Game Guide and Walkthrough

You will need to do it three times and at the end you should find the treasure you're looking for.

Minikit #8

Beneath three big rocks you will find three small stones - The Pass of Caradhras - Collectibles - LEGO The Lord of the Rings - Game Guide and Walkthrough

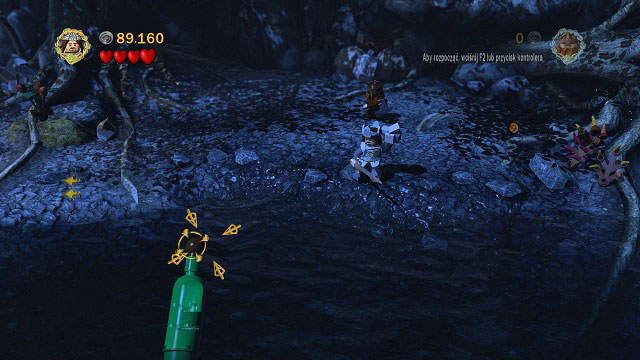
Beneath three big rocks you will find three small stones. Pick them up and throw them at the bottles floating in the water.

Minikit #9

Needed: climb walls, phial, light fire, axe, fishing

In the left part of the map, around the middle of climbing with Legolas, you will find a dark cave - The Pass of Caradhras - Collectibles - LEGO The Lord of the Rings - Game Guide and Walkthrough

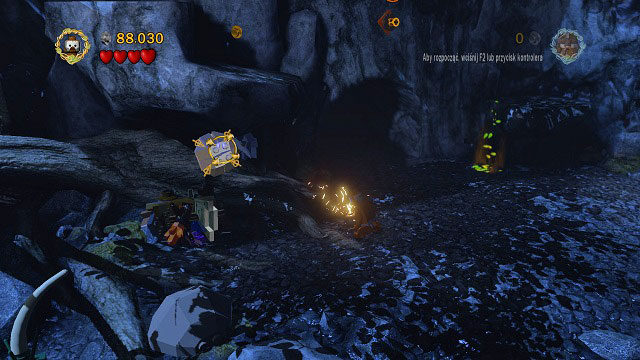
In the left part of the map, around the middle of climbing with Legolas, you will find a dark cave. Change to Frodo and head inside it while lighting up the path with the Phial.

Inside you will have to approach a wall which can be climbed by Gollum - The Pass of Caradhras - Collectibles - LEGO The Lord of the Rings - Game Guide and Walkthrough

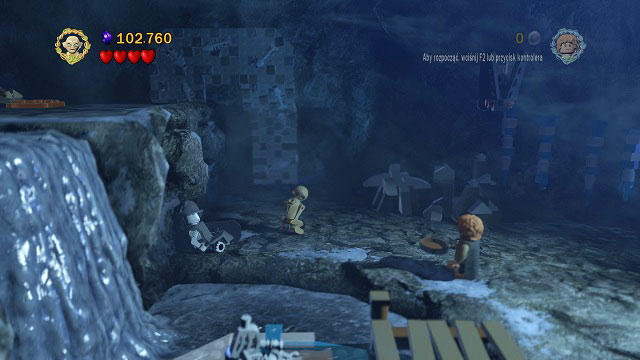
Inside you will have to approach a wall which can be climbed by Gollum. Climb it and change to Sam to start a fire. Now you will need to feed the Troll: Gimli has to break the ice and Gollum fish.

Take the fish to the Troll and the monster will spit the chest onto you - The Pass of Caradhras - Collectibles - LEGO The Lord of the Rings - Game Guide and Walkthrough

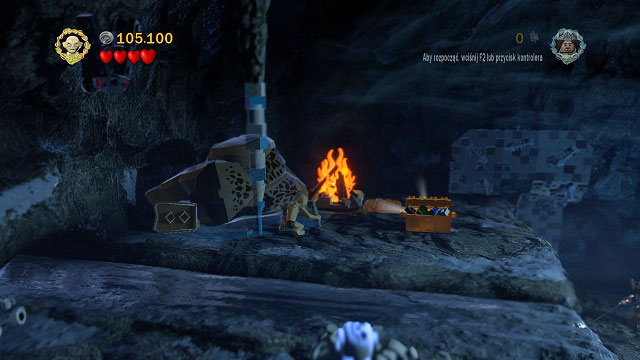
Take the fish to the Troll and the monster will spit the chest onto you.

Treasure: Ice Lolly

From where you fed the Troll, you have to move towards the camera, break the rocks and dig up the ground to pick up the treasure - The Pass of Caradhras - Collectibles - LEGO The Lord of the Rings - Game Guide and Walkthrough

From where you fed the Troll, you have to move towards the camera, break the rocks and dig up the ground to pick up the treasure.

Minikit #10

Needed: elven rope

As you're fighting the monster, use the rope on the hook in the right side of the arena, climb up and destroy the plant - The Pass of Caradhras - Collectibles - LEGO The Lord of the Rings - Game Guide and Walkthrough

As you're fighting the monster, use the rope on the hook in the right side of the arena, climb up and destroy the plant. Now just pick up the chest.

See/Add Comments

You are not permitted to copy any image, text or info from this page.

This site is not associated with and/or endorsed by the Warner Bros Interactive Entertainment or Traveller's Tales. All logos and images are copyrighted by their respective owners.

Copyright © 2000 - 2024 GRY-Online S.A. for gamepressure.com, unofficial game guides, walkthroughs, secrets, game tips, maps & strategies for top games.