Guides & Walkthroughs New Guides Popular RPG Action Strategy Adventure YouTube Guides Mobile App
Free iOS App iPhone & Ipad
Download Game Guide PDF, ePUB & iBooks

LEGO Harry Potter Years 1-4 Guide & Walkthrough by gamepressure.com

LEGO Harry Potter Years 1-4 Guide & Walkthrough

Table of Contents

LEGO Harry Potter Years 1-4: Year 4 Part 2 - Walkthrough LEGO Harry Potter 1-4 guide, walkthrough

Last update: 29 December 2020

Hogwarts

1 - LEGO Harry Potter Years 1-4: Year 4 Part 2 - Walkthrough - Walkthrough - LEGO Harry Potter: Years 1-4 Game Guide & Walkthrough
You will begin in the Gryffindor Common Room (M2 - LEGO Harry Potter Years 1-4: Year 4 Part 2 - Walkthrough - Walkthrough - LEGO Harry Potter: Years 1-4 Game Guide & Walkthrough

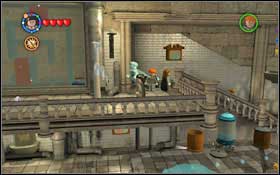
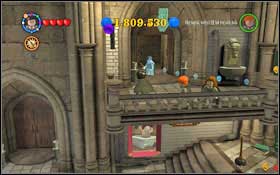
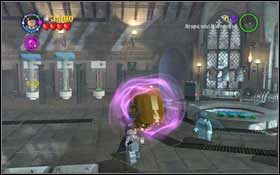
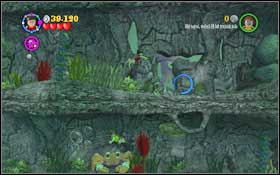
You will begin in the Gryffindor Common Room (M2.15). Go outside and follow the ghost to Hagrid's Hut (M3.24) - you will come across another student on your way. Head towards the Bathroom Hallway (M1.4), head onto the upper floor and destroy the blockade with (RD) #1. At the end you will find Moaning Myrtle - follow her into the bathroom #2.

Secret of the Egg

2 - LEGO Harry Potter Years 1-4: Year 4 Part 2 - Walkthrough - Walkthrough - LEGO Harry Potter: Years 1-4 Game Guide & Walkthrough
You have to collect four green shells and place them on the wall - LEGO Harry Potter Years 1-4: Year 4 Part 2 - Walkthrough - Walkthrough - LEGO Harry Potter: Years 1-4 Game Guide & Walkthrough

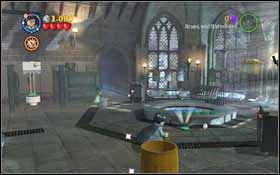
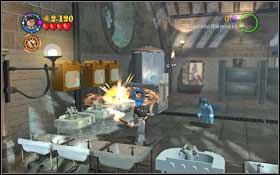
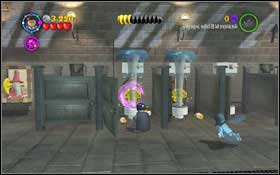
You have to collect four green shells and place them on the wall. The first is right next to you #1. Head left - there are three leaking sinks there. Use magic on them #2 and eventually the shell in will fall out of the container beside.

3 - LEGO Harry Potter Years 1-4: Year 4 Part 2 - Walkthrough - Walkthrough - LEGO Harry Potter: Years 1-4 Game Guide & Walkthrough
Approach the wizard painting - in one of the cabinets on the right you will find a couple bricks - assemble (WL) an umbrella from them #1 - LEGO Harry Potter Years 1-4: Year 4 Part 2 - Walkthrough - Walkthrough - LEGO Harry Potter: Years 1-4 Game Guide & Walkthrough

Approach the wizard painting - in one of the cabinets on the right you will find a couple bricks - assemble (WL) an umbrella from them #1. Hand it over to the Wizard - he will clog the hole and give you a shell. In the barrel, right next to the chest with a Boggart, you will find a couple bricks (WL) #2. Assemble a toilet seat (WL) from them.

4 - LEGO Harry Potter Years 1-4: Year 4 Part 2 - Walkthrough - Walkthrough - LEGO Harry Potter: Years 1-4 Game Guide & Walkthrough
Use (WL) on one of the planks #1 - the ghost will do the same with the other one - LEGO Harry Potter Years 1-4: Year 4 Part 2 - Walkthrough - Walkthrough - LEGO Harry Potter: Years 1-4 Game Guide & Walkthrough

Use (WL) on one of the planks #1 - the ghost will do the same with the other one. You will receive a shell; go down the stairs #2.

5 - LEGO Harry Potter Years 1-4: Year 4 Part 2 - Walkthrough - Walkthrough - LEGO Harry Potter: Years 1-4 Game Guide & Walkthrough
Theres a broom by the pool - clean (WL) the stained-glass window using it #1 - LEGO Harry Potter Years 1-4: Year 4 Part 2 - Walkthrough - Walkthrough - LEGO Harry Potter: Years 1-4 Game Guide & Walkthrough

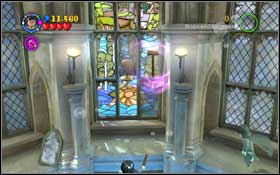
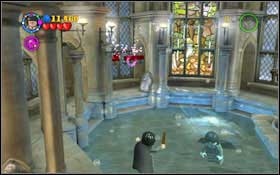
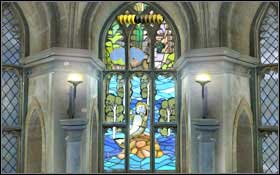
There's a broom by the pool - clean (WL) the stained-glass window using it #1. The siren will throw out a box with crabs - destroy them all and make a small railway from the bricks (WL) #2.

6 - LEGO Harry Potter Years 1-4: Year 4 Part 2 - Walkthrough - Walkthrough - LEGO Harry Potter: Years 1-4 Game Guide & Walkthrough
Use the cloud (WL) by the column on the siren to fill the stained-glass windows with water #1 - LEGO Harry Potter Years 1-4: Year 4 Part 2 - Walkthrough - Walkthrough - LEGO Harry Potter: Years 1-4 Game Guide & Walkthrough

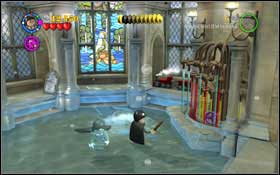
Use the cloud (WL) by the column on the siren to fill the stained-glass windows with water #1. In return you will receive a valve - place it on the right side and turn (WL) #2.

Hogwarts

7 - LEGO Harry Potter Years 1-4: Year 4 Part 2 - Walkthrough - Walkthrough - LEGO Harry Potter: Years 1-4 Game Guide & Walkthrough
You begin in the Main Hall (M1 - LEGO Harry Potter Years 1-4: Year 4 Part 2 - Walkthrough - Walkthrough - LEGO Harry Potter: Years 1-4 Game Guide & Walkthrough

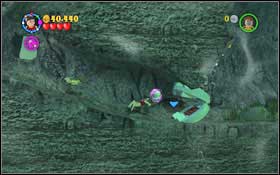
You begin in the Main Hall (M1.1). Follow Nearly Headless Nick to the Black Lake (M3.27). Destroy the entrance gate with (RD) #1. Go down the stairs and towards the gate behind one of the professors #2.
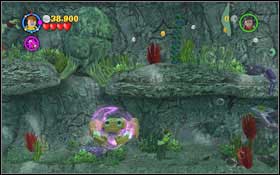
The Black Lake

8 - LEGO Harry Potter Years 1-4: Year 4 Part 2 - Walkthrough - Walkthrough - LEGO Harry Potter: Years 1-4 Game Guide & Walkthrough
NOTICE: The construction of this level is somewhat different from the other ones - LEGO Harry Potter Years 1-4: Year 4 Part 2 - Walkthrough - Walkthrough - LEGO Harry Potter: Years 1-4 Game Guide & Walkthrough

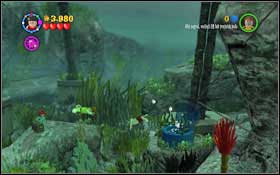
NOTICE: The construction of this level is somewhat different from the other ones.

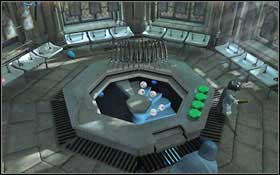
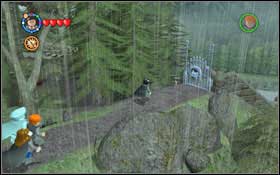
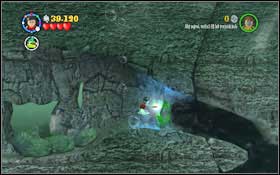
Swim to the right and you will reach a pipe #1, thanks to which you will get closer to the screen. Keep swimming right. The next pipe will be blocked - use magic on the rocks #2.

9 - LEGO Harry Potter Years 1-4: Year 4 Part 2 - Walkthrough - Walkthrough - LEGO Harry Potter: Years 1-4 Game Guide & Walkthrough
You can either swim to the other side or to the right - LEGO Harry Potter Years 1-4: Year 4 Part 2 - Walkthrough - Walkthrough - LEGO Harry Potter: Years 1-4 Game Guide & Walkthrough

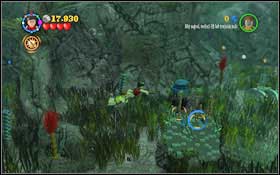
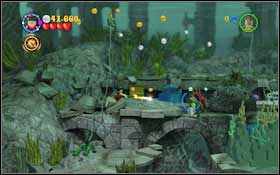
You can either swim to the other side or to the right. Whichever option you choose, you will reach an octopus #1. Unfasten a tentacle with (WL) - the second character will do the same with the other one. Continue swimming right. You will eventually reach a blocked passage - on two rock ledges you will find two big bricks - attach them (WL) to the middle one #2. You will create a fish which will make the big boulder fall.

10 - LEGO Harry Potter Years 1-4: Year 4 Part 2 - Walkthrough - Walkthrough - LEGO Harry Potter: Years 1-4 Game Guide & Walkthrough
Just like before, swim right in the next location - LEGO Harry Potter Years 1-4: Year 4 Part 2 - Walkthrough - Walkthrough - LEGO Harry Potter: Years 1-4 Game Guide & Walkthrough

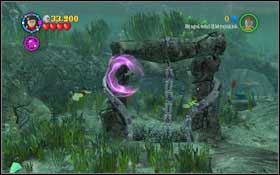
Just like before, swim right in the next location. One character will take the lower route and the other one the upper. Switch to the lower character, lift (WL) the door blockade and swim below it #1. Place the giant crab (WL) on the purple bricks on the left #2.

11 - LEGO Harry Potter Years 1-4: Year 4 Part 2 - Walkthrough - Walkthrough - LEGO Harry Potter: Years 1-4 Game Guide & Walkthrough
Switch to the upper character and use magic on the octopus eye #1 - LEGO Harry Potter Years 1-4: Year 4 Part 2 - Walkthrough - Walkthrough - LEGO Harry Potter: Years 1-4 Game Guide & Walkthrough

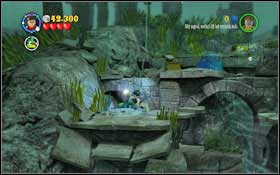
Switch to the upper character and use magic on the octopus' eye #1. Get rid of the Devil's Snare (LS) blocking your way #2.

12 - LEGO Harry Potter Years 1-4: Year 4 Part 2 - Walkthrough - Walkthrough - LEGO Harry Potter: Years 1-4 Game Guide & Walkthrough
Up you will find a red bush - after using magic on it, a pearl will fall out #1 - LEGO Harry Potter Years 1-4: Year 4 Part 2 - Walkthrough - Walkthrough - LEGO Harry Potter: Years 1-4 Game Guide & Walkthrough

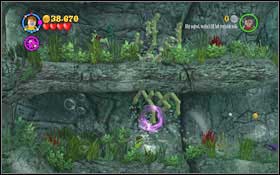
Up you will find a red bush - after using magic on it, a pearl will fall out #1. Place it by the shellfish blocking the passage below #2.

13 - LEGO Harry Potter Years 1-4: Year 4 Part 2 - Walkthrough - Walkthrough - LEGO Harry Potter: Years 1-4 Game Guide & Walkthrough
In the last part you will come across sirens - look out for them - LEGO Harry Potter Years 1-4: Year 4 Part 2 - Walkthrough - Walkthrough - LEGO Harry Potter: Years 1-4 Game Guide & Walkthrough

In the last part you will come across sirens - look out for them. Destroy the rocks surrounding the pipe entrance #1. Before you swim through, there's an anchor on the right and left - use (WL) on them. Additionally you need to chase away the Devil's Snare on the left with (LS) #2. Swim through the pipe.

14 - LEGO Harry Potter Years 1-4: Year 4 Part 2 - Walkthrough - Walkthrough - LEGO Harry Potter: Years 1-4 Game Guide & Walkthrough
Place the violet pearl on the scale #1 - LEGO Harry Potter Years 1-4: Year 4 Part 2 - Walkthrough - Walkthrough - LEGO Harry Potter: Years 1-4 Game Guide & Walkthrough

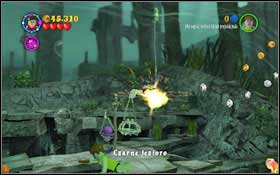
Place the violet pearl on the scale #1. Afterwards use (WL) on the anchor. Once you have a blockade by every chain, use magic on them and they will break #2.

Hogwarts

15 - LEGO Harry Potter Years 1-4: Year 4 Part 2 - Walkthrough - Walkthrough - LEGO Harry Potter: Years 1-4 Game Guide & Walkthrough
You begin at the Grand Staircase (M2 - LEGO Harry Potter Years 1-4: Year 4 Part 2 - Walkthrough - Walkthrough - LEGO Harry Potter: Years 1-4 Game Guide & Walkthrough

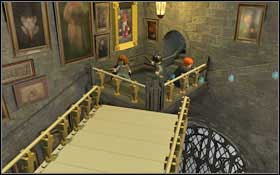
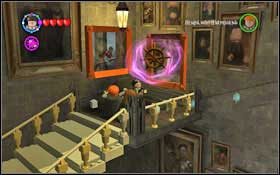
You begin at the Grand Staircase (M2.8). Wave to the wizard on the picture #1 and he will move the stairs. Go up and wait a bit for the further stairs to appear. Destroy the chest and throw the wheel (WL) #2 to the wizard in the picture. Afterwards use magic on him and to switch the stairs.

16 - LEGO Harry Potter Years 1-4: Year 4 Part 2 - Walkthrough - Walkthrough - LEGO Harry Potter: Years 1-4 Game Guide & Walkthrough
Wait a bit again - LEGO Harry Potter Years 1-4: Year 4 Part 2 - Walkthrough - Walkthrough - LEGO Harry Potter: Years 1-4 Game Guide & Walkthrough

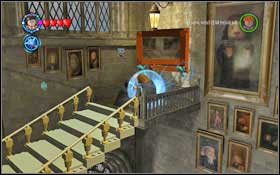
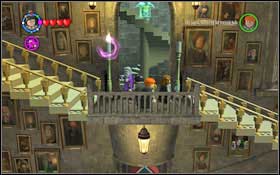
Wait a bit again. Eliminate two pixies (IM) holding the painting #1 and place it on the wall (WL). Use magic on it and the wizard will switch the stairs. Enter the Dumbledore's Office (M2.10) #2.

The Dark Lord Returns

17 - LEGO Harry Potter Years 1-4: Year 4 Part 2 - Walkthrough - Walkthrough - LEGO Harry Potter: Years 1-4 Game Guide & Walkthrough
Use magic on the four bushes round the base of the statue and then assemble (WL) the gold armour #1 - LEGO Harry Potter Years 1-4: Year 4 Part 2 - Walkthrough - Walkthrough - LEGO Harry Potter: Years 1-4 Game Guide & Walkthrough

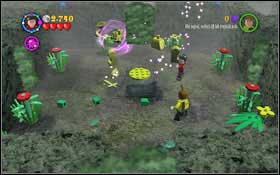
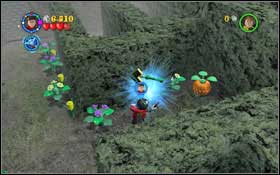
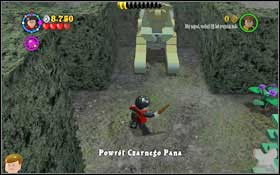
Use magic on the four bushes round the base of the statue and then assemble (WL) the gold armour #1. Use magic on it and keep a track of its sword movements #2. The order of passages you have to take is being shown. The statue keeps on moving all the time - you have a limited amount of time to get out of this part of the labyrinth.

Exit route: right, left.

18 - LEGO Harry Potter Years 1-4: Year 4 Part 2 - Walkthrough - Walkthrough - LEGO Harry Potter: Years 1-4 Game Guide & Walkthrough
In the further part, eliminate the pixies holding a part of the armour with (IM) #1 - LEGO Harry Potter Years 1-4: Year 4 Part 2 - Walkthrough - Walkthrough - LEGO Harry Potter: Years 1-4 Game Guide & Walkthrough

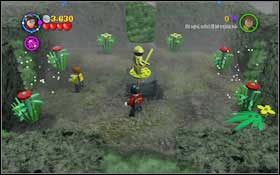
In the further part, eliminate the pixies holding a part of the armour with (IM) #1. Assemble the armour (WL), use magic on it again and it will show you the proper way.

Exit route: left, right, down.

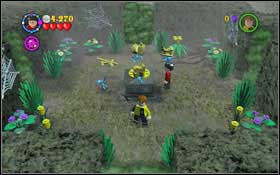
In the third part, chase away the Devil's Snare (LS) and put together (WL) the armour #2.

Exit route: right, left, down, up.

19 - LEGO Harry Potter Years 1-4: Year 4 Part 2 - Walkthrough - Walkthrough - LEGO Harry Potter: Years 1-4 Game Guide & Walkthrough
You will find yourself in a labyrinth - LEGO Harry Potter Years 1-4: Year 4 Part 2 - Walkthrough - Walkthrough - LEGO Harry Potter: Years 1-4 Game Guide & Walkthrough

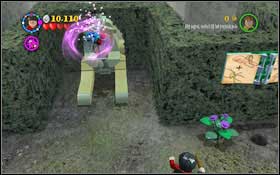
You will find yourself in a labyrinth. Go forward - you will come across moving walls #1. Wait for the passage to be clean, head forward and try not to be pushed. This situation will repeat three more times #2.

20 - LEGO Harry Potter Years 1-4: Year 4 Part 2 - Walkthrough - Walkthrough - LEGO Harry Potter: Years 1-4 Game Guide & Walkthrough
You will eventually reach a spot with a pixie holding an arrow on the right #1 - LEGO Harry Potter Years 1-4: Year 4 Part 2 - Walkthrough - Walkthrough - LEGO Harry Potter: Years 1-4 Game Guide & Walkthrough

You will eventually reach a spot with a pixie holding an arrow on the right #1. Eliminate him (IM), place the arrow on the pole and use (WL) to turn it #2.

21 - LEGO Harry Potter Years 1-4: Year 4 Part 2 - Walkthrough - Walkthrough - LEGO Harry Potter: Years 1-4 Game Guide & Walkthrough
By doing this, you will move the wall on the left - move on - LEGO Harry Potter Years 1-4: Year 4 Part 2 - Walkthrough - Walkthrough - LEGO Harry Potter: Years 1-4 Game Guide & Walkthrough

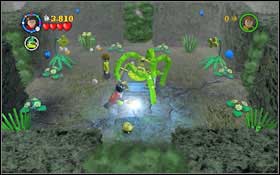
By doing this, you will move the wall on the left - move on. You will reach a sphinx #1 - head left and use (WL) on the big, green book #2. Bricks will fall out of it and an image of a sphinx running away from a spider will appear.

22 - LEGO Harry Potter Years 1-4: Year 4 Part 2 - Walkthrough - Walkthrough - LEGO Harry Potter: Years 1-4 Game Guide & Walkthrough
Assemble the bricks (WL) into a trampoline and jump behind the fence - LEGO Harry Potter Years 1-4: Year 4 Part 2 - Walkthrough - Walkthrough - LEGO Harry Potter: Years 1-4 Game Guide & Walkthrough

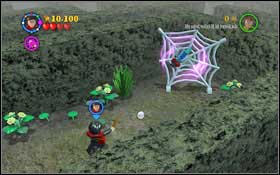
Assemble the bricks (WL) into a trampoline and jump behind the fence. Chase away the Devil's Snare (LS) and place the fly (WL) on the spider-web #1. A spider will show up and destroy the fence. Assemble the fly (WL) and place it onto the sphinx #2.

23 - LEGO Harry Potter Years 1-4: Year 4 Part 2 - Walkthrough - Walkthrough - LEGO Harry Potter: Years 1-4 Game Guide & Walkthrough
You will have to fight Lord Voldemort - LEGO Harry Potter Years 1-4: Year 4 Part 2 - Walkthrough - Walkthrough - LEGO Harry Potter: Years 1-4 Game Guide & Walkthrough

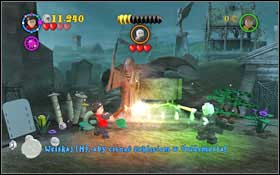
You will have to fight Lord Voldemort. Keep eliminating the Death Eaters as they appear #1. Once you face Voldemort himself #2 keep on pressing [H] to cast a stronger spell. Repeat it three times.

See/Add Comments

You are not permitted to copy any image, text or info from this page.

This site is not associated with and/or endorsed by the Warner Bros Interactive or Traveller's Tales. All logos and images are copyrighted by their respective owners.

Copyright © 2000 - 2024 GRY-Online S.A. for gamepressure.com, unofficial game guides, walkthroughs, secrets, game tips, maps & strategies for top games.