Exit 17 | Walkthrough HL2 Episode One Guide
Last update: 11 May 2016
Open the door and destroy the planks that block the passage (#147). You'll meet with Barney (#148) who'll ask you to escort a group of rebels to the train station. Wait for them to come here and find an entrance to the complex (#149). Look around the big hall. The hideout entrance is located behind one of the locomotives (#150). After a short walk you'll rendezvous with the rest of the team. There's a Colt in here, so take it.
 |  |
 |  |
Alyx will decide to take the machinegun and tell you to go for the other group. Watch out for the Manhacks, run towards the building where Barney has hidden himself. When you meet your companions, you'll be attacked by a group of enemy soldiers. Take them out and run back to the hideout.
Time to evacuate the third group. When you leave, watch out for the sniper (#151) who is in one of the windows on the other side of the square. It's not easy - you have to get near him by hiding behind the car wrecks. When you manage to do that, throw a grenade into the window. Take the rest of the rebels with you.
 |  |
Take out the soldiers who appeared on the roof (Colt is beyond any competition here) and run to the station. Inside one of the enemies will block the way to Alyx by shooting the locomotive. Wind a platform to the right (#152) and reach the hideout the other way. Watch out for the enemies who attack you from above - and also remember to grab their ammo.
Wait until Alyx kills the enemies and go back to the square. You'll have to face some more soldiers, and eventually an ATV (#153). You'll have to use rockets on the latter. There's a lot of them in a crate near the entrance to the station (#154). When you're done here, take the group with you and run to the station. Kill all the soldiers and go inside.
 |  |
Go back to the square to get the final group. Before you get to Barney, though, you'll have to deal with the enemy soldiers. When you start to head for the station, don't bother fighting them. Just run, exterminating only the ones inside the complex (there are Manhacks in here, too; use you Machinegun on them). When all the rebels are inside the hideout, join them in there.
Alyx will unlock another passage (#155). There's no time to loose, run forth. There's a gauge near the security room (#156), which you can use to open the gate. When the girl is on the other side, enemies will attack you, including a very irritating robot called Strider.
 |  |
 |  |
Leave the cage and hide behind the metal wall. Wait until the machine destroys the container to the right (#157). Use the new passage. Kill all the soldiers and destroy two pallets (#158) that block you way.
There's a health regeneration point nearby (#159). There's also an open container, that will let you pass to the other side of the complex. Turn right and get to the platform using the other container (#160).
 |  |
Go ahead. The robot will strike again, creating a new passage for you. Go forth, avoiding the bullets. At the end turn left, jump across the hole (#161) and run over the container.
 |  |
On the left you'll see a regeneration point (#162). You can regain your health there without being shot by anyone. Destroy the barrels before you and prepare for a little Grav Gun operation.
 |  |
The platform that you're on is mined. You have to grab all the mines from the floor and throw them away. In order to do that without being hit by the droid, always get near them and crouch. When the way is secured, run forth and jump towards the other part of the base (#153). Destroy the supply crates and run to the right (#164 - don't take too long in here, as the droid will take advantage of it and strike you).
 | 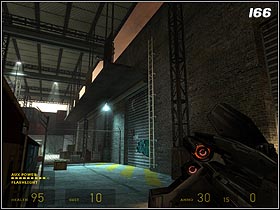 |
Jump down and run along the train, getting rid of the mines on your way. Just before the end of the corridor, turn left and go between the wagons to the other side of the station (#165). Now climb the ladder (#166). There's a crate filled with rockets here. As you might guess, they're for dealing with this darn droid. Target precisely. Those "guided" missiles have an annoying habit of turning over and destroying your cover.
 |  |
When Strider is defeated, go down using the second ladder (#167). After meeting with Alyx enter the train (#168) and wait patiently until you are as far as possible from this God forsaken city.