Direct Intervention | Walkthrough HL2 Episode One Guide
Last update: 11 May 2016
Go straight ahead and defeat the enemy soldiers. After you reach the control room (#31) it will turn out that you have to single handedly secure the reactor before it blows out. Follow Alyx to another room and wait for her to call an elevator (#32). Enter it and ride down.
 |  |
 |  |
First eliminate the two Stalkers (#33), located on the opposite platforms. Use the energy balls to kill them. Also, use the all-purpose spheres to activate the two bridges, by shooting them into familiar mechanisms (#34). Go forth and use the red button (#35) when you see it.
 | 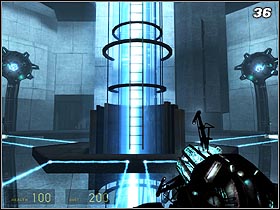 |
Thanks to the bridge rotation that it caused, you can now reach the ladder (#36) that leads to the upper level. When you're up, turn around and go straight ahead. Kill all the enemies and look around the room.
Just above the glass you'll notice a mechanism that lacks power (#37). Go back to the main hall and grab one of the energy balls. Shoot it towards the mechanism and you'll be 1/3 way through.
 |  |
The door opens and enemy soldiers and Manhacks enter the room. Get rid of them and use the new passage to go further. At the end of the corridor grab a sheet of metal (#38) and crawl inside. Avoid contact with the balls (you can outmaneuver them, reflect with a Grav Gun, or jump over them) and go through the tunnel (#39).
 |  |
Grab another sheet of metal from the wall and enter the opening you created this way. Kill the enemy soldiers and go forth - you'll reach the reactor core room. Enter the bridge (#40) and go to the other side of the room, avoiding the big ball in the center.
You'll reach another reactor control mechanism (#41). Eliminate all the enemies and grab an energy ball to shoot it toward it. Wait for the next door to open and enter the elevator.
 |  |
There are some enemies on your way, but you'll be able to regain your strengths here as well. At the end, jump across the railing on one of the rotating platforms (#42). Watch out for the Manhacks floating around (don't fight them) and jump to another platform (#43) across the room. You can now deal with Manhacks, grabbing them with your Gravity Gun and shooting against the walls.
 |  |
 |  |
Go forth. At the end grab a sheet of metal (#44) from the wall and crawl through the opening. Go through the tunnel avoiding the energy balls once again (#45) and find another niche for a sheet of metal to grab. You'll end up by the final reactor control room.
Grab an energy ball from the tunnel and send it towards the mechanism. Something will go wrong and the machine won't function as it should. Enter the hole and check out the situation in the next room.
 |  |
There are three cables before you (#47) that are out of power. You have to grab two balls from the tunnel through the opening in the ceiling (#48) and release them towards the generators. Before you shoot the third ball in there, retreat towards the platform. You'll be transported back up when the power's back on.
 |  |
Grab a ball and start the final mechanism once again. The reactor is secured - at least for the time being. Wait for the gate to open and go forth. Approach Alyx (#50) and then follow her. The girl will explain you the present situation.
Run with her to the elevator. Run straight ahead until you reach a room filled with mines (#51). Grab one of them and approach the girl. When the "ball" is reprogrammed, do the same with a second one.
 |  |
 |  |
There're a lot of enemies in the nearby room. Shoot both mines in there (#52) and they'll soon be neutralized. Alyx will deactivate the force field and open the way to the train (#53). Recharge your energy if you need to and enter it. The ride will end with the train being derailed. Crawl towards the girl and move the container with a Stalker (#55). There's a door nearby (#56). Open it and go outside. Crouch down and go below the pile of junk.
 |  |