The Lost Bastille - let's continue | Walkthrough Dark Souls II Guide
Last update: 11 May 2016
Key points of Dark Souls 2 - The Lost Bastille
Passage to another location
Trap
Shortcut/Passage/Area
Landmark/Switch
Bonfire
NPC (friendly)
Item
Rare opponent/Boss
Shortcut/Passage/Area
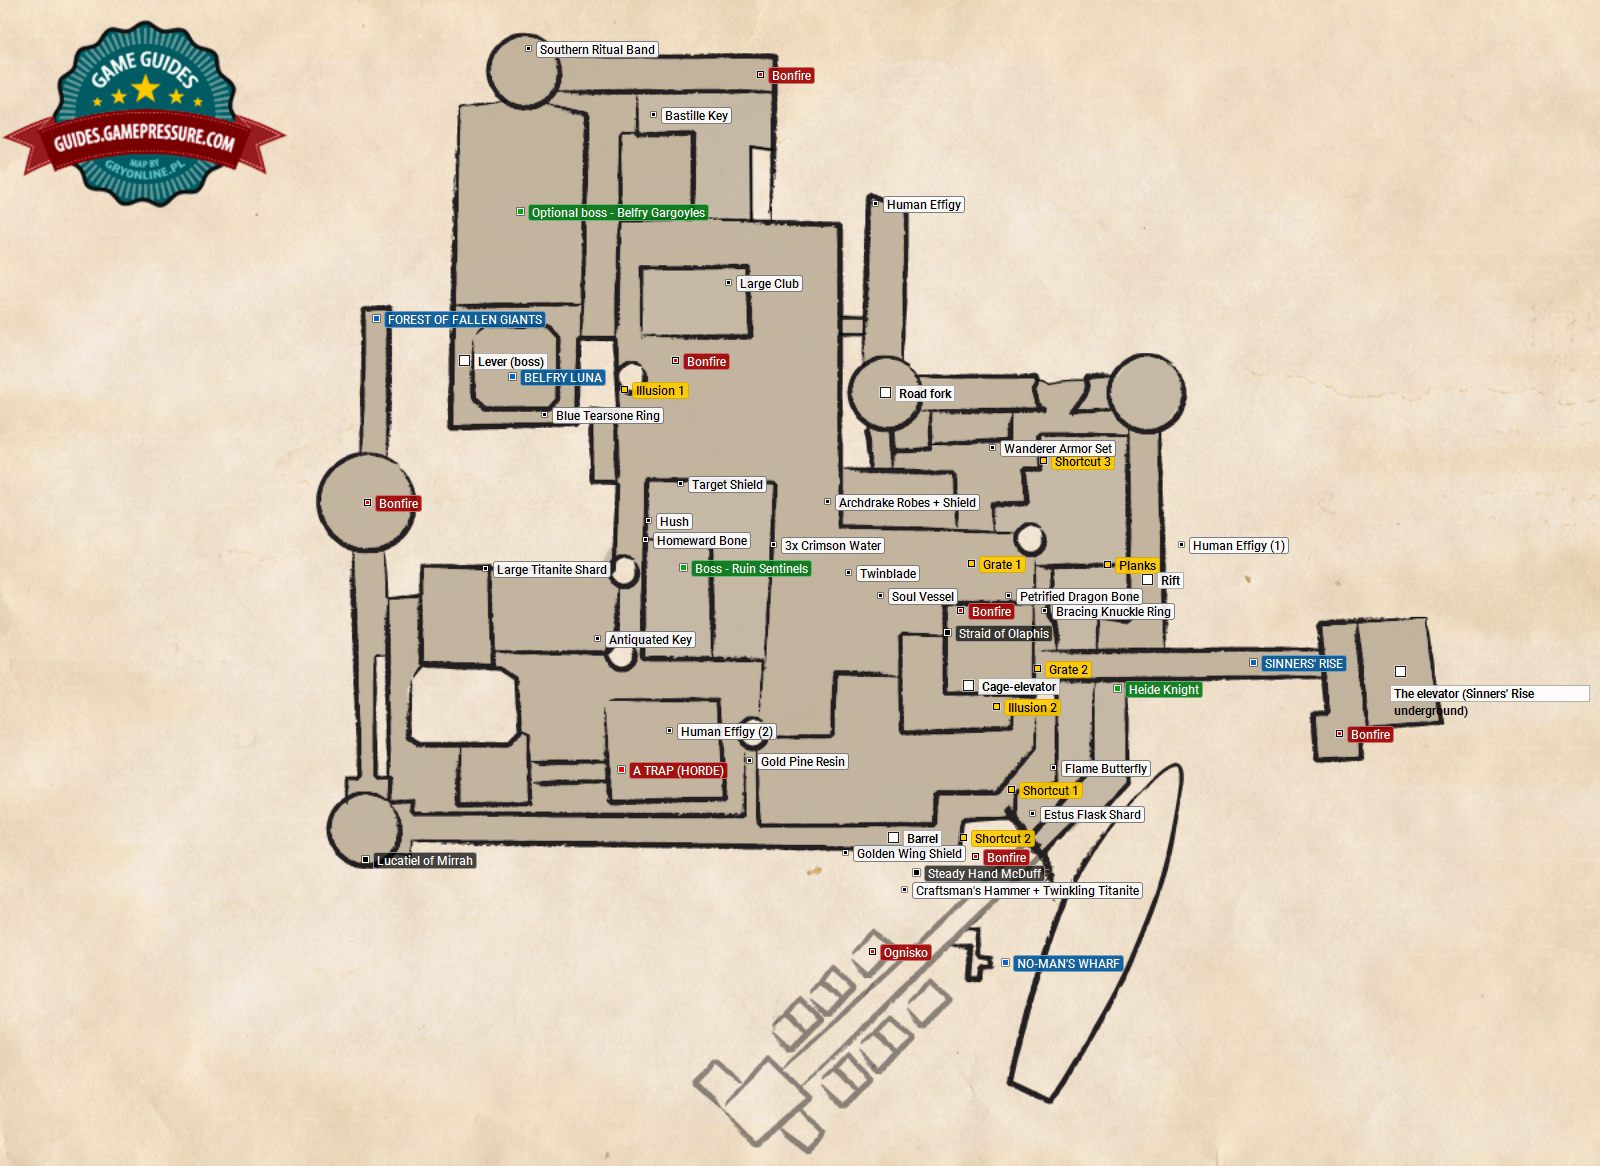
Shortcut 1 � After you jump down into the crack in the wall, turn left and reach the end of the yard, whilekeeping to the right wall. After you defeat several dogs, you will reach a grate that you can open with the nearby lever.
Shortcut 2 � Allows you to unlock the bonfire and the blacksmith earlier.
Shortcut 3 � Requires the Antiquated Key. Leads to the location filled with planks.
Grate 1 � As you go away from the Servants' Quarters bonfire, you approach a fork - there, climb up the stairs. You will walk into a location with exploding mummies. The switch is in the corridor, right next to them.
Grate 2 � On the floor above the location with the mummies. Opens the way to the Sinner's Rise
Illusion 1 � After you use the Pharros lock and destroy the illusion, you will open the way to Belfry Luna
Illusion 2 � In the location with the two ladders and several exploding mummies, enter the small room opposite the entrance - the illusion is right befor you. In the next corridor, examine the wall on the left - another illusion will allow you to exit to the balcony.
Planks � You can destroy them with the sword and explore the location afterwards.
Rare opponent/Boss
Heide Knight � - Once per game.
Boss - Ruin Sentinels
Optional boss - Belfry Gargoyles
NPC (friendly)
Lucatiel of Mirrah
Straid of Olaphis � Requires the Fragrant Branch of Yore, 3 INT, 3 FTH. Allows you to exchange the boss souls for equipment.
Steady Hand McDuff � Requires the Bastille Key or Shortcut 2. After you light the torch in the forge, he will move near the anvil and unlock access to treasures. After you deliver the Dull Ember (Iron Keefl.) he will be able to perform infusion.
Bonfire
Bonfire � Straid's Cell. The second floor above the location with the mummies.
Item
Human Effigy (1) � After you fall into the crack in the wall, you need to go right - the item is on the corpse.
Human Effigy (2) � - After you defeat the hostile horde, take the stairs - the item is at the end of the location, next to the locked gate.
Antiquated Key � The Antiquated Key and the Covetous Silver Serpent Ring. After you enter the building through the window and defeat the dogs, you simply need to exit through the door to the yard. The items are in the chest, in the corner of the location.
Estus Flask Shard � After you jump down through the crack in the wall, turn left and reach the very end of the yard, while keeping to the left wall. The chest with the item is at the end of the narrow passage.
Hush � The illusory wall on the left of the location with the boss. After you open the passage, climb up the ladder - the spell is in the chest.
Target Shield � The illusory wall opposite the entrance to the boss chamber. The item is in the chest.
Homeward Bone � The illusory wall, where you found the Hush. After you open the passage again, you will walk into the main chamber. The item is on the corpse.
3x Crimson Water � The illusory wall on the upper floor, after you take the passage on the right side of the boss chamber. Note: in the middle, there is an exploding mummy!
Large Club � - In the location below the bonfire
Blue Tearsone Ring � Walk onto the first floor, where you fall into one of the rifts. The item is in the chest.
Southern Ritual Band � In the chest at the bottom level of the tower.
Bastille Key � After you defeat the Red Phantom and the horde of dogs. Some of the opponents can be shot with the bow, from the wall.
Bracing Knuckle Ring � You get to it after you find the second illusion. You simply need to keep to the left wall - the item is on the corpse.
Petrified Dragon Bone � Requires the Bastille Key. In the cell next to the bonfire.
Flame Butterfly � After you pass through the second illusion, you need to jump over the rift.
Golden Wing Shield � From the location, where you obtained the Flame Butterfly, jump down to a narrow cornice. Then - move along the cornice to the very end - the shield is next to the corpse.
Craftsman's Hammer + Twinkling Titanite � In the chest that McDuff is sitting on. If you light the torch at the other side of the workshop and rest at the bonfire, the blacksmith will move and you will be able to collect the treasure.
Wanderer Armor Set � After you take the third shortcut, or reach the bonfire at the Servants' Quarters, you will find a well in the yard. When you hit the stone, it falls to the bottom and raises a cage with three (!) exploding mummies inside. After you defeat the last one, it drops the armor set.
Archdrake Robes + Shield � Move from the direction of the third shortcut. In the location, where there used to be an archer, there are gunpowder barrels. Use fire arrows, or the firebomb to blow them up, which opens the way to the armor and the shield.
Twinblade � Twinblade + Parrying Dagger + Bone Staff. Approach from the direction of the third shortcut. In the location behind the archer, you need to take the ladder and fall down onto the elevation, at the end of which there was the archer.
Soul Vessel � - In the location with the Twinblade, use the Pharros Key. The item is past the illusion, in the chest.
Trap
A TRAP (HORDE) � After you open the door, you will encounter a sizeable group of opponents. It is best to lure them out one-by-one. Another big group is in the location to the left of the entrance.
Passage to another location
SINNERS' RISE
Landmark/Switch
Lever (boss) � At the very top of the tower. Opens the way to the boss.
Cage-elevator � You reach it from the direction of the location with the second grate. If you jump onto the edge below, you will be able to collect the Bonfire Ascetic. At the very bottom, there is a Pharros' Lockstone..

Get back to the bonfire in the Lost Bastille and use the stairs leading to the corridor - at its end you will find a door. After opening it, you will be able to cross through the wooden planks to reach the wall. You will encounter another giant on your left side. Defeat him, get inside the tower and use the passage on the left side. There's another enemy lurking just behind it. Kill him and get to the subsequent roof to collect a Flame Butterfly. Jump on the other roof to collect souls. Climb up the ladder to reach the next room. You will notice a zombie, sitting by the barrels - kill it before it gets up.

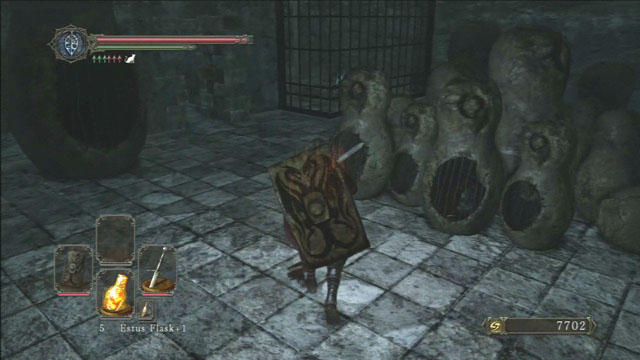
Use the switch to raise the grating - another one, behind which a group of zombies await, will open automatically. Defeat the enemies and enter the next room. There are stone, cage-like objects here - smash them, as there are zombies hidden inside. Another enemy is lurking above you, on a stone ledge. You will encounter two additional zombies on the upper level. Open the door and enter the next room. On the opposite wall you will find a corpse containing a Skeptic's Spice. To get the other items present in this room, you will have to work a little - Silvercat Ring is worth equipping, as it decreases the fall damage. On the first ledge you will find a Bonfire Ascetic. Jump below and collect a Wilted Dusk Herb from a chest. To go back up, you will need to enter the cage hanging on a chain.

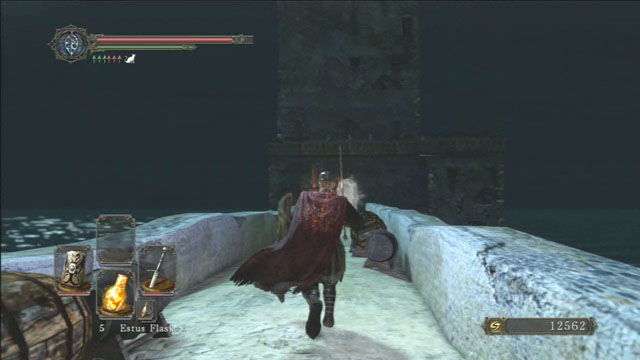
Get to the upper floor and defeat the mummies lurking there. You will notice a bonfire in a cell, blocked by a stone statue - ignore it for now, as you will unlock it later. You can open the next cell by using the Bastille Key - inside you will find a Petrified Dragon Bone. Go back down and use the switch, to open the grating. Turn to the right and defeat a knight around the corner of the room, to pick up a Lifegem. Run through the bridge towards the mist, avoiding the crossbowmen's belts. Run all the way to the mist, without a single stop and none of them should reach it. Go through the passage and climb up the wall, hidden behind a hole in the wall, to get to the upper level. Light up the bonfire.

