Orzammar - Paragon of her kind | Orzammar Dragon Age: Origins Guide
Last update: 11 May 2016
Received from: Prince Bhelen [Orzammar - Diamond quarter - Royal Palace] or Lord Harrowmont [Orzammar - Diamond quarter - Harrowmont's mansion]

Description: This is a common quest for both Harrowmont and Bhelen and you shouldn't expect any changes depending on who gave you the order to start this mission. You can officially start this mission once you've arrived in [Caridin's cross] (M56, 1). Make a few steps forward here and get ready to defend yourself against a large group of bandits. Make sure to eliminate an elven mage as soon as possible. Once he's gone deal with the less deadly dwarven warriors.
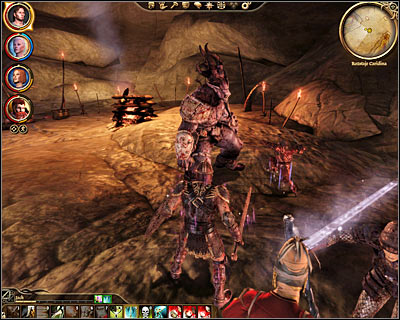
Your current objective is to reach the southern areas of the thaig and there are two main passageways (M56, 2) leading to that location. If you choose the western passageway you would have to be ready for difficult battles. A lot of powerful monsters would stand in your way, including herlock/genlock mini-bosses, shrieks (they stay in the shadows and attack by taking allied units by surprise) and an ogre (M56, 3). Soon after defeating the ogre you would find a passageway leading to the main hall area of the thaig (M56, 4).

Choosing the eastern passageway would result in you having to battle very large group of deepstalkers. You should know by now that these creatures aren't powerful, even if they would manage to take you by surprise. As a result reaching the southern section of the map would be much easier in this case. After defeating the last group of monsters you would have to find a passageway (M56, 6) leading south.

Aside from the monsters you should also watch out for traps, because there's going to be a lot of them in the area. Try disarming as many of them as possible before the start of each fight. Both passageway will lead you to the crossroads (M56, 7) and you shouldn't be surprised to encounter even more monsters there. Use the ballistae to your advantage and don't forget to eliminate a new mini-boss sooner rather than later. You must head east in order to move on with the mission.

If you want to leave this area as soon as possible remain on the main path leading east and then turning south. Otherwise you may consider spending some additional time exploring two passageways found along the way. The first passageway leads south and choosing it would result in your team encountering an extremely powerful alpha ogre (M56, 9). In addition to the large beast you would also encounter other mini-bosses (including emissaries) and new shrieks.

The second passageway leads to the east and it's the deepstalkers' lair. You would have to defeat a lot of these creatures, including a new boss - deepstalker matriarch (M56, 11). Thankfully eliminating this monster would much easier than fighting the ogre. When you're ready to continue the main mission head south until you'll find a passageway leading to the next area (M56, 12). Wait for the map of the Deep Roads to be displayed on your screen and confirm that you want to travel to [Ortan thaig].

Start off by heading forward (M57, 1). Sadly you won't be allowed to remain on the main path for too long, because the passageway will be collapsed and you'll have to choose a nearby tunnel. During your time spent in this thaig you'll be dealing mostly with different types of spiders. I wouldn't recommend moving forward until you've dealt with all the monsters, so you won't encourage any other spiders to attack you. Having good spells and potions is also an important thing, especially when it comes to bringing back poisoned characters to full strength.

You'll witness two battles taking place along the way (M57, 2) and in both cases the darkspawn (including ogres) will be going against the spiders. I would strongly recommend to attack only the side with a huge advantage over the one. The main reason is that if the battle ends too quickly then the winning side would automatically attack your team. Naturally you can't expect both sides to be exterminated at the same time, but the winning side should have only a few units left after achieving victory.

Keep heading north, however you'll soon have to turn west. It shouldn't take long until you leave the tunnels by ending up inside a huge cavern (M57, 3). Notice a lot of ghosts of fallen dwarves in the area. Thankfully the ghosts will also die if you use conventional weapons against them. It's the golems you should be more worried about, because most of their attacks will inflict serious injuries to one or more of your team members. Always try killing them first if you can.

Keep heading forward and watch out for additional spiders near the area where you've seen Ruck. Two large bridges lead to the next area (M57, 7) and you can choose either one of them. Be careful, because these objects will be protected by ghosts and by golems (one golem for each bridge). When you're safely on the other side deal with the remaining ghosts and choose the only available tunnel. You'll be moving west here, but you'll soon turn to north-east.

You should know that you're slowly approaching the area where you'll have to defeat the main boss of this thaig (M57, 8), so it would be a good idea to save your game before entering the last cavern. Once you're inside start off by eliminating some of the closest enemy units. Don't get too close to Branda's journal if you're not ready yet to trigger a boss fight. Watch out for new emissaries here, as well as for spiders.

When you'll try to read the journal (M57, 9) you'll encourage the boss to appear in the cavern. The creature you'll have to kill will be the corrupted spider queen. Naturally team members should start attacking the queen right away, however it's also important to secure this entire area to prevent your allies from being bothered by other spiders. This battle will be divided into several phases. Each time you've noticed that the queen has escaped you'll have to deal with a couple of weaker spiders. Once they're gone the queen will appear again (thankfully she won't regenerate in the meantime) and you'll be allowed to resume the main battle. Don't forget to monitor health bars of your teammates and to use spells or potions to deal with negative effects of being poisoned.

You can now approach Branda's journal without the risk of being interrupted again. Click on the journal to automatically read it and to update your mission status. Since you already know where to go you can use a nearby passageway to leave this area (M57, 10). Wait for a map of the Deep Roads to appear on your screen and confirm that you want to travel to [The dead trenches]. When you get to the trenches (M58, 1) make sure to watch the whole cut-scene before moving on.

Start off by heading south and it shouldn't take too long until you come across allied units (M58, 2) defending themselves against the darkspawn. Naturally you should assist your dwarven friends in dealing with the monsters and it shouldn't be too hard for you to defeat all the incoming waves. You can even encourage some of the monsters standing in the back to come here, so you won't have to fight them on your own later on in the game. Once it's safe talk to Kardol, but he won't share any useful information with you.

As you've probably suspected your job will be to cross the large bridge (M58, 3). You'll have to be careful here, because you'll encounter new enemy units on the bridge, as well as on the other side. There's also going to be an ogre in the area. I would strongly recommend attacking the ogre from the distance and waiting for it to come closer, so you won't have to worry about any other threats while fighting the beast. Pay attention to shrieks and enemy archers while trying to secure this entire area. You'll soon notice that you won't be allowed to use the main gate, so instead you'll have to travel north to find an entrance to a new tunnel (M58, 4).

I guess you won't be surprised to hear that a lot of monsters must be defeated along the way. Try separating single units from the rest to increase your chances of winning and don't forget to heal members of your team each time they've lost a lot of blood. A larger battle will take place in the next cavern (M58, 5) and aside from the standard monsters you'll also have to defeat two mini-bosses (a Bronto and Genlock emissary). You've probably noticed by now that you won't be allowed to cross the next bridge, so instead you'll have to travel south.

Watch out for a new trap located near the entrance to a new chamber (M58, 6). This isn't the only nasty surprise you can expect to find here, because other traps can be found in the area. Make sure to move slowly, so you won't end up being surrounded by larger groups of monsters. You'll also have to defeat new spiders and that can be quite tricky, because you'll be dealing with the strongest kind. Keep heading forward until you reach an area with a lot of pillars and sculptures (M58, 7).

A forge can be found to the south of here. Securing this area is optional, however it's something you should consider if you're planning on earning additional experience points. The most important thing for you to know about is that the forge is being guarded by a lot of monsters, including genlock forge master (M58, 8). You can encourage this opponent to follow you quite easily and then you can kill him away from the other monsters. If you want to focus only on your mission proceed directly to the north to end up in the huge cavern again (the one with a destroyed bridge).

You'll have to be extremely careful while moving north, because once you're about a half way through you're going to be attacked by a very large group of shrieks (M58, 9). Don't forget to keep attacking single targets instead of random monsters at the same time and protect your less powerful teammates. After you've won you can start moving north again. Enter the next room and this time get ready to defeat a group of devouring skeletons. Thankfully it'll be a much easier task and they won't attack you by surprise. Wait until it's safe and choose the door located on the eastern wall of the room (M58, 10).

Keep heading east, however you will be presented with an opportunity to explore a northern corridor along the way. Doing so would result in a large battle with the spiders and find a new emissary. If you remain on the main path it shouldn't take long until you reach a new room where you'll meet Hespith (M58, 11). You're going to have a short conversation and afterwards the woman will escape. Proceed towards the western exit and SAVE YOUR GAME before leaving the room.

There are TWO ogres just around the corner (M58, 12) and you should focus on attacking them one at a time. Start off by attacking the ogre seen to the south. If you do this from a larger distance you should be able to get its attention without the second ogre showing up at the same time. Once you've defeated the first ogre check the eastern door to find a second beast. Make sure to heal your team after both battles and then head south (you can't use the eastern gate just yet).

Once you're inside a new room ignore all the ghosts seen nearby and instead examine two objects - Legionnaire's relic and Legionnaire's altar (M58, 13). Take the Legionnaire's key and notice that you've made the nearby ghosts angry and therefore you'll have to eliminate all of them. Once it's safe again return to the large gate where one of the ogres was standing the first time you've seen him. Open the door with the newly acquired key, but before you move forward SAVE your current game. The reason for that is simple - you'll very close to a new boss fight.

Get ready for a very challenging boss battle with the Broodmother (M58, 15) and I urge you to remember about three things here. In the early stages of the battle you should be focused mostly on destroying her tentacles. Each tentacle has its own health bar and won't be able to regenerate itself, so it should make the fight a little easier. Destroying all the tentacles will allow you to focus mostly on the main boss and that will make the difference near the end.

Keep attacking the tentacles until they disappear and that's when you should switch your attention to attacking the Broodmother. Make sure to keep your archers and mages in the back, because some of Broodmother's attacks will be nasty and will stun your warriors for a short period of time. Don't forget to heal your allies and to apply antidotes. Being poisoned will become an important factor near the end when the broodmother won't be able to defend herself using the tentacles.

From time to time you'll also be dealing with standard enemy units and sadly you won't be allowed to ignore them, because they won't go away overtime. Remember that the faster you kill them the sooner you'll be allowed to focus on the boss again. This is going to be a long and a tiresome battle, but as long as you won't make any major mistakes you should win it in your first attempt, without having to repeat the entire scene several times. Once you've won you'll see a cut-scene and you'll have a chance to talk to Hespith again.

You may now use the passageway located directly behind Broodmother's body (M58, 16). I wouldn't recommend going to the last area of the Deep Roads right away, because it would be a good idea to return to Orzammar to restock. Once you're ready for the final part of this mission travel to [Anvil of the void] (M59, 1). Make a few steps forward here and notice that until this quest has come to an end Oghren will have to be a part of your team. You'll now have a chance to talk to Branda (M59, 2) and then you'll start exploring the labirynth.

Start off by moving forward. In the first section of the caves (M59, 3) you'll be dealing with different types of hurlocks and genlocks, as well as with several mini-bosses (including a Genlock alpha and a Genlock emissary). Try hiding your team behind nearby objects to prevent distant archers and mages from attacking them and keep pushing forward. The last section of this cave will also be occupied by a new ogre (M59, 4) and I wouldn't recommend attacking this beast unless you've already defeated all of the remaining monsters.

You'll soon reach a slightly larger room filled with deadly fumes (M59, 5). I would strongly recommend leaving your entire team outside. Enter the room alone in order to provoke the first golem to wake up and to chase after you. Return to the previous corridor quickly and wait for the beast to arrive. You can now kill the monster with the help from the rest of your team. Notice that each time you've killed a golem a new one will come back to life, however you can keep repeating all the actions described above without worrying about the rest. Once you've defeated the last golem enter the room again, however this time focus on finding four valves on both sides of the chamber. Interact with the valves to get rid of the toxins. I wouldn't recommend ignoring this problem, because you'll probably want to return here in the near future.

More surprises await you in the next large room of the underground complex (M59, 6). This time you should notice that the golems are standing on both sides of the long room and each time you've moved closer to them they'll return to life in pairs. I would recommend retreating to the previous room each time (the one with the valves), so you'll have plenty of room to fight without worrying about other problems, including new traps. Don't forget to pay more attention to your teammates and to their health bars. You'll have to eliminate two groups of golems and aside from the monsters you'll also have to watch out for traps. Once it's safe move on to the next area of this thaig.

Get ready for a new fight (the last one before the grand battle) and take your time to understand its rules, because all the standard methods won't work this time. Approach a large statue with moving heads (M59, 7) and you'll be allowed to start the fight after seeing a short cut-scene. The objective here will be to destroy the statue, but it's the method of achieving this goal where it gets more interesting, Instead of the statue start this battle by attacking one (and ONLY one!) of the dwarven spirits.

Notice that when the spirit you were attacking finally dies it creates a shockwave around its body, activating a corresponding spirit anvil. Click on the anvil quickly in order to send a projectile towards the statue. If you've done everything correctly you'll witness a fiery explosion. I would recommend that you move back after each attack to avoid the statue striking back and to heal your team members. Thankfully if you didn't attack other spirits they shouldn't pursue you.

You'll now have to keep repeating all the actions described above to destroy four sides of the statue. Bear in mind that each side has to be hit twice. After the first hit the blue eyes of the statue will start bleeding and after the second hit it will stop glowing and the spirits will longer continue appearing in front of it. You don't have to be good at math to count that in total you'll have to perform eight successful strikes (two hits per side, four sides of the statue). I would recommend that you remain near the spirit anvil located close to the entrance to the room, because after each hit the statue will turn 90 degrees, allowing you to attack it from the exact same spot. Of course it's all up to you how to play this out, however once you fully understand the rules you shouldn't have any major problems (other than having to spend here at least a few minutes).

Once the statue has been destroyed you'll be allowed to proceed to a new passageway unlocked nearby (M59, 8). Before you enter the last cavern (M59, 9) MAKE SURE to save your current game., because going there will start an important conversation with Caridin and Branda. You can find out more about the possible endings of your journey in the section describing Anvil of the void quest.