Urn of the Sacred Ashes | Main quests Dragon Age: Origins Guide
Last update: 11 May 2016
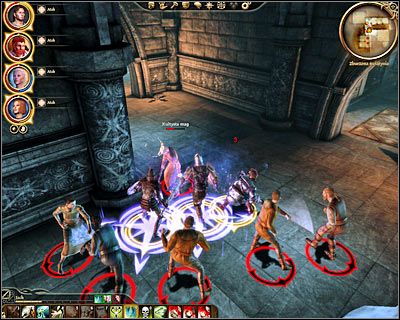
![Description: In order to begin this main quest you must travel to [Denerim - Market district - Brother Genitivis house] Once youre inside talk to Weylon (M65, 10) and explain that you need to find the ashes to cure arl Eamons disease - Urn of the Sacred Ashes | Main quests - Main quests - Dragon Age: Origins Game Guide](/dragonageorigins/gfx/word/12164562.jpg)
Description: In order to begin this main quest you must travel to [Denerim - Market district - Brother Genitivi's house] Once you're inside talk to Weylon (M65, 10) and explain that you need to find the ashes to cure arl Eamon's disease. Weylon will send you to Lake Calenhad, however you can continue having this conversation. Use cunning and intimidation to back Weylon into a corner. He'll finally decide to attack you to prevent you from finding out his secret. Thankfully Weylon is a low level mage, so defeating him shouldn't be a big problem.

Remain inside brother Genitivi's home and check one of the rooms in the back. Open a chest (M65, 11) and collect Genitivi's research to find out that in order to retrace his steps you must travel to [Village of haven]. You can head on to that location right away or you can check the location recommended by Weylon which is going to be [Lake Calenhad docks - Spoiled princess]. After your arrival in the tavern you would have to talk to the innkeeper (M32, 7) and outside the building you would have been attacked by a band of cultists (M32, 8). This is all optional, so you should take the trip only if you want to earn additional experience points.
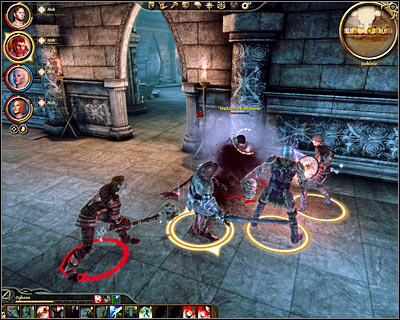
![When you arrive at [Village of haven] youll find yourself standing outside of the town (M60, 1) - Urn of the Sacred Ashes | Main quests - Main quests - Dragon Age: Origins Game Guide](/dragonageorigins/gfx/word/12164593.jpg)
When you arrive at [Village of haven] you'll find yourself standing outside of the town (M60, 1). Head forward and talk to one of the guards. This conversation is not a big deal, especially since he won't share any useful knowledge with you. Instead he'll tell you to find Eirik. You can now go inside [Village of haven - House] (M60, 2). Collect some of the useful items from nearby chests and then examine the altar (M60, 3).

Once you're back outside you'll notice that you have been attacked by a large group of cultists. You'll be dealing mostly with peasants, so winning here should be an easy thing. You can now inspect a nearby pier or you can proceed directly towards a nearby hill. Be careful, because you'll encounter stronger opponents in a few moments. Each time a new battle has started make sure to focus on eliminating enemy mages first. I would also recommend attacking cultists from the distance, because you'll have to plenty of opportunities to injure them before they move closer to your team.
![You can explore a new hut along the way, marked on your map as [Village of haven - Village store] (M60, 4) - Urn of the Sacred Ashes | Main quests - Main quests - Dragon Age: Origins Game Guide](/dragonageorigins/gfx/word/12164625.jpg)
You can explore a new hut along the way, marked on your map as [Village of haven - Village store] (M60, 4). You won't encounter any enemies inside the store, but on the other hand you'll have a chance to collect some really cool items from the nearby crates (M60, 5). Exit the store and continue heading towards the top of the hill. The only path is going to be guarded, but you shouldn't have any major problems reaching your final destination [Village of haven - Chantry] (M60, 6).

Once you're inside the chantry you'll have a chance to talk to Eirik (M60, 7) and a new battle is going to take place shortly after you've made the introductions. I would recommend that you attack Eirik first, so he won't have a chance to cast too many spells. Deal with other guards only when he's already dead. Check Eirik's body after the battle and collect the cultist's medallion. Once this is done click on a wall (M60, 8) in the north-western side of the room where you'll find brother Genitivi. This conversation has two endings. You can convince your new ally that you can continue on your own and that he should return to his home in Denerim or you an agree that he should help in gaining access to the temple. Wait for the entire team to be transported to [Ruined temple] (M61, 1).

Make a few steps forward after your arrival in the temple. If brother Genitivi is a member of your team he'll automatically open the main gate for you. Otherwise you'll have to perform this action which shouldn't be a problem. Enter the temple (M61, 2) and be ready to defeat new cultists occupying the main room. Secure this largest area before moving on to smaller rooms.

There are four corridors in the area and you should spend some time exploring each one of them. The corner in the south-west will contain a body of an adventurer and you'll also find a small room being guarded by the cultists. The corner in the south-east has a locked door and library with a lot of valuable documents. The corner in the north-east can be ignored for the time being and that leave us with a corridor found in the north-west of the main chamber.
Approach this corridor slowly (M61, 5) and get ready to defend yourself against larger groups of cultists as you progress. The first group of hostiles will attack you as soon as you've opened a door. Aside from the cultists you'll also have to defeat a creature called a bronto which you might have already met in Orzammar. There are a lot of traps in the area, so it would be a good idea to keep using rogue's abilities to disarm them. Expect more resistance when you reach rooms located further away from the main chamber and each time you've engaged enemy units in battle start by killing their mages.

Make sure that it's safe and then enter the room located in the south-east. You'll have to click on some items lying on the ground to find a key (M61, 7). Once this is object is in your possession return to the main chamber and notice that new cultists have arrived in the meantime. Deal with all enemy units and then head on to the corner in the south-east. There's a locked door which you can now open using the newly acquired key (M61, 8). Find a chest inside. Opening it will allow you to get your hands on the main hall key.

Return to the main chamber for the second time and this time head north, because you'll be allowed to use the second key to open a new door (M61, 9). I would recommend saving your progress before moving on. There's a mage in the next room and it would be a good idea to eliminate him from a large distance. Once he's gone enter the room (M61, 10) and get ready to defend yourself against a surprise attack made by the ash wraiths. Use the stairs after the battle and click on the brazier.

The next room of the temple is going to be occupied by a new group of cultists. I would recommend to encourage them to follow you to the southern room, so during the battle you won't have to worry about stepping on any traps. Deal with all the enemies and head north. Keep fighting the cultists, however ash wraiths will soon join the battle (M61, 11). Deal with the monsters once the cultists are dead and keep monitoring health bars of your team members.

There are two passageways leading to the next section of the temple - the eastern one and the western one. It won't really matter which path you'll decide to choose, because eventually you'll make your way to [Ruined temple - Caves] (M61, 12). Notice that if you choose the western passageway you will find several chests along the way (M61, 13). Opening each chest will result in your team being attacked by powerful ash wraiths, so it's a good opportunity to score a lot of experience points. Make your way to one of the exits and leave the main temple.
Soon after your arrival in the underground caves (M62, 1) you'll have to defeat the first mini-boss - cultist overseer (M62, 2). I would recommend that you encourage him to leave the room and to come and get you. Once he's gone deal with other threats and start exploring the caves. There's going to be only one passageway here leading to your current destination, so you shouldn't get lost. Instead focus on finding and disarming traps.

You'll soon start encountering dragonlings and you may know these creatures from your time spent in the mage's tower. Eliminating the tiny dragons won't be a big problem, however you should prevent them from surrounding your team. Keep moving slowly, so you won't have to fight too many of them at the same time. You'll soon enter a larger cave (M62, 3) and you should consider attacking new enemies from a larger distance. Watch out for cultist mages and prevent them from casting too many powerful spells by attacking them with your warriors as soon as possible.

Keep pushing towards the northern areas of the cave complex. New dragonlings and cultists will stand in your way. Watch out especially while going through larger caves, because most of them are going to be heavily defended. One of the upcoming caves will have two exits. If you decide to choose the eastern exit (M62, 4) you would be given a chance to defeat a couple of larger dragons (subquest opportunity). Choosing the western corridor (M62, 5) will allow you to resume the main mission.
Be careful, because you'll soon start encountering cultist assassins and they'll be using camouflage much like rogues in your team. When you get to a new junction (M6, 7) you can head north to explore the caves or turn west to focus on the mission. If you go north you would have a chance to defeat other dragons, as well as a new mini-boss - cultist overseer (M62, 8). It would be a good idea to eliminate this boss before he shields himself with powerful defensive spells. Once he's gone kill two dragons and the remaining third creature would be waiting for you in the east (along with the last group of the cultists).

Choosing the western corridor (M62, 9) will get you one step closer to your current goal which is to find the urn. A large group of cultists is occupying one of the nearby caverns. You'll have to be careful here, because not only you'll be going against mages and assassins but you'll also have to avoid a lot of traps (M62, 10). Head west once you've won and it won't take too long before you get closer to the last cavern (M62, 11). I would recommend saving your progress before you approach Kolgrim and his men.
STOPPING THE CULTISTS:

Stopping the cultists is an obvious choice for a true hero and you can attack them right away or you can listen to what Kolgrim has to say first. Start the battle by sending your men to deal with two mages. It's extremely important to kill them in a short period of time before they injure your characters or make them weaker. Once the mages are gone start attacking normal warriors and finish off by defeating Kolgrim who obviously is going to be a boss here. Make sure to check Kolgrim's body after the battle to collect his horn.
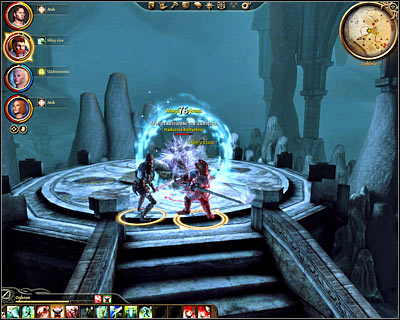
![You may now use the nearby passageway to travel to [Ruined temple - Top of the mountain] (M62, 12) - Urn of the Sacred Ashes | Main quests - Main quests - Dragon Age: Origins Game Guide](/dragonageorigins/gfx/word/12164859.jpg)
You may now use the nearby passageway to travel to [Ruined temple - Top of the mountain] (M62, 12). Notice that you'll be allowed to use the horn here by choosing this item in your inventory. Doing this will result in the arrival of a huge dragon. I have to warn you that it's going to be EXTREMELY difficult to kill this creature and you shouldn't blow the horn unless you're prepared for the battle. During the fight with the dragon your warriors should be focused on distracting the beast and your archers and mages should attack the beast from a larger distance. Focus on keeping your men alive, because dragon's attacks will inflict massive injuries. Having a lot of health potions in your disposal is also an important thing. If you manage to defeat the dragon check its body for a scale (needed for one of the subquests) and for powerful items. If you aren't skill enough ignore the dragon and focus only on completing the main task.
HELPING THE CULTISTS:

This is a decision you'll want to make if you're playing as an evil hero and it will result in the destruction of the urn by mixing the ashes with dragon's blood. If this is what you want confirm that you want to help Kolgrim and he'll give you a vial with dragon's blood. Don't forget to mention Eamon during the conversation, so that you'll be allowed to collect a sample of the ashes for yourself prior to destroying the rest. Bear in mind that your good-hearted followers will protest against what you're trying to do and it would be a good idea to leave them in the camp before instead of trying to persuade them.
![You may now use the path located near Kolgrim to travel to [Ruined temple - Top of the mountain] (M62, 12) - Urn of the Sacred Ashes | Main quests - Main quests - Dragon Age: Origins Game Guide](/dragonageorigins/gfx/word/12164890.jpg)
You may now use the path located near Kolgrim to travel to [Ruined temple - Top of the mountain] (M62, 12). Make a few steps forward to see a cut-scene featuring a dragon and then head forward. You'll soon witness a second cut-scene and this time Kolgrim will "explain" the dragon that you're here to help.
COMPLETING FOUR TRIALS:

This is a common route, so you'll have to take it even if you agreed to help the cultists. Start off on the mountaintop by heading forward and opening a gate leading to [Ruined temple - Trials] (M63, 1). Here you'll also have to move forward, but it won't take long until you'll have a chance to talk to the Guardian (M63, 2). It doesn't matter how you'll reply to his questions, because the most important thing is to find out about the four trials. Confirm that you're ready to start and answer a personal question before leaving this area.

The first trial (M63, 3) will require you to talk to eight ghosts. If you answers their riddles correctly each ghost will turn itself into mist and become a part of the key. If you answer incorrectly the ghost will transform itself into a mini-boss (ash wraith) and it shouldn't be something to ignore. I would even encourage you to give bad responses, because you will receive more experience points for defeating the ghost rather than for making it go away. Here's the list of the ghosts along with correct answers to their questions:
1) Bronna - About the dreams.
2) Tan Shartan - About home.
3) General Maferat - About jealousy.
4) Archon Hessarian - About mercy.
5) Ealisay - About a tune.
6) Lady Vasilia - About vengeance.
7) Disciple Havard - About the mountains.
8) Disciple Cathaire - About the hunger.

Once you've killed or satisfied all eight ghosts a large gate is going to open, allowing you to move towards the next room. Talk to a ghost of a familiar person along the way and then proceed to a new area (M63, 4). Here you'll have to defeat your... team. The only difference is that they're going to be ghosts, so you'll have to exploit their weaknesses based on your observations. I would recommend starting with the mage and then dealing with the rest. Winning this trial will unlock the next door.

In this case smart planning is going to be a key to success (M63, 5). The idea of this riddle is to allow one of your team members to reach the other side of the room safely. Three remaining allies will have to assist in achieving that goal by standing on certain movable pieces located on both sides of the abyss.
Here's the full solution:
 | Step 1. Character number 1 is standing somewhere in front of the abyss. Characters number 2, 3 and 4 take positions on different movable pieces in order to extend two stable segments of the bridge.
|
 | Step 2. Character number 1 moves to the second stable segment of the bridge and stops there. Characters 2, 3 and 4 remain where they are.
|
 | Step 3. Character number 3 moves to a different floor piece. Characters 1, 2 and 4 remain where they are.
|
 | Step 4. Character number 2 moves to a different floor piece. Characters 1, 3 and 4 remain where they are.
|
 | Step 5. Character number 1 moves to the third stable segment of the bridge. Characters 2, 3 and 4 remain where they are.
|
 | Step 6. Character number 4 moves to a different floor piece AND THEN character number 3 moves to a different floor piece. Character number 2 is not moving the whole time. Once character number 3 has finished moving character number 1 can proceed to the exit.
|

The last fourth trial (M63, 6) is going to be the easiest one. Approach the altar located in front of the entrance, click on it and confirm that you want to unequip your things. You can now step through the flames to complete this challenge. Wait for the Guardian to show up (M63, 7) and to congratulate you on a job well done.
CHOOSING THE ENDING:

To be honest the ending has been decided a long time ago (during the conversation with Kolgrim to be more specific) and now you'll do what has to be done. If you've defeated the cultists you can take the ashes needed to heal Eamon right away. After that you will have to return to brother Genitivi in [Ruined temple] (M61, 1) or in [Denerim - Market district - Brother Genitivi's house] (M65, 10). If he was still in the temple don't forget to visit him in Denerim later on during her game, because he'll have a present for you (master dweomer rune).

If you've decided to help the cultists in destroying the urn you can take the ashes needed to save Eamon and then you can use the vial with dragon's blood to destroy the rest. Your good-hearted followers will be so furious that they'll attack you on the spot, so as I've told you before it would be a good idea to ditch them before starting the trials. You'll also have to deal with the Guardian and two ash wraiths. You can leave this location after the battle. Kolgrim will be waiting for you in [Ruined temple - Top of the mountain] (M63, 8) and he'll reward you with a possibility of drinking dragon's blood.