
Broken circle | Main quests Dragon Age: Origins Guide
Last update: 11 May 2016
![Description: Start this quest by travelling to [Lake Calenhad docks] (M32, 1) and when you get there proceed directly to the pier to talk to templar Carroll (M32, 2) - Broken circle | Main quests - Main quests - Dragon Age: Origins Game Guide](/dragonageorigins/gfx/word/7136734.jpg)
Description: Start this quest by travelling to [Lake Calenhad docks] (M32, 1) and when you get there proceed directly to the pier to talk to templar Carroll (M32, 2). You can convince him to take you to the tower by allowing him to have a chat with Morrigan. Don't worry about not being able to convince him if Morrigan is not a part of your team, because you can always show him the treaties at the end of this conversation.
![Carroll will transport you to [The Circle tower - Student quarters] (M33, 1) and youll automatically trigger a conversation with Greagoir (templar in charge) - Broken circle | Main quests - Main quests - Dragon Age: Origins Game Guide](/dragonageorigins/gfx/word/7136750.jpg)
Carroll will transport you to [The Circle tower - Student quarters] (M33, 1) and you'll automatically trigger a conversation with Greagoir (templar in charge). During this conversation offer your help in resolving the situation in the tower. Remember that once you've started exploring the tower you won't be allowed to go back, so you should stock up on supplies (especially on potions). Step through a nearby gate when you're ready (M33, 2).
![This lowest level of the tower is being occupied by several friendly mages (M33, 3) and a woman who goes by the name of Wynne will be among them (youve already had a chance to meet her in [Ostagar]) - Broken circle | Main quests - Main quests - Dragon Age: Origins Game Guide](/dragonageorigins/gfx/word/7136765.jpg)
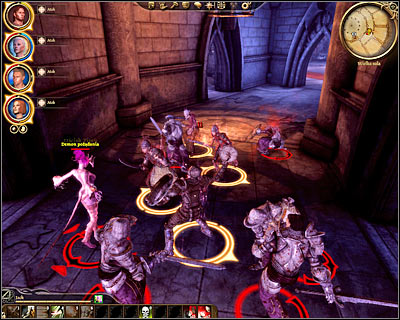
This lowest level of the tower is being occupied by several friendly mages (M33, 3) and a woman who goes by the name of Wynne will be among them (you've already had a chance to meet her in [Ostagar]). If you're playing as a VERY bad person you may decide that the only way to cure the disease is to not leave anyone breathing. The best solution is to keep Wynne and the rest alive, because Wynne will join your team. I would recommend switching her with Morrigan, because she has some very powerful healing spells in her arsenal and those which will come in handy in the near future. Approach a nearby force field and confirm that you want to enter an unsafe area of the tower (M33, 4).

You'll have to be very careful from now on, because you'll be dealing with different types of abominations. One of the most important things to know about these creatures is that they tend to explode shortly after they've been killed. Don't forget about that and try to stay away from their bodies to avoid unwanted injuries. As for the rest of the demons, try using ice spells to inflict major injuries if possible. The first mini-boss will attack you near the main area of this level (M33, 5) and it's going to be the greater rage demon. Once it's gone enter the last room and locate the stairs leading to [The Circle tower - Mage quarters] (M33, 6).

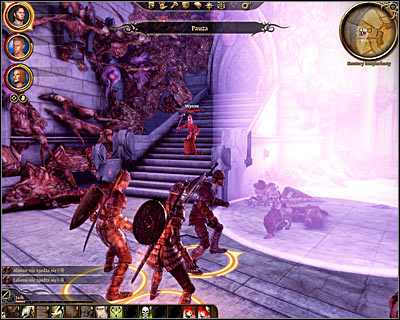
Shortly after you've arrived at the new area you'll have a chance to talk to Owain (M33, 7). He'll tell you some interesting things about Niall, however questioning him about all the details is not mandatory. Proceed to the next room of the tower where you'll encounter three blood mages (M33, 8). Make sure to always focus on one target and check if you have any spells or abilities which would allow you to repel possible curses. Once all the mages have been defeated you'll trigger a short conversation. You can now finish them off or spare their lives.

Continue exploring other areas of the tower, heading towards the largest central room. I guess you won't be surprised to hear that along the way you'll defeat other blood mages, as well as abominations, zombies and demons. At least one of the group of blood mages will be caught up in a big fight and it would be a good idea to wait for this battle to end before attacking them. Don't forget to visit Irving's office along the way to collect valuable items. Eventually you'll have to make your way to the stairs leading to [The Circle tower - The great hall] (M33, 11).
This is a large level (M34, 1) filled with a lot of hostile creatures. The first mini-boss you'll encounter is going to be an arcane horror and it would be a good idea to attack it from a larger distance (same idea with the standard zombies). One of the rooms further in the back will on the other hand be occupied by a demon surrounded by possessed templars (M34, 3) and I wouldn't recommend going there unless you're absolutely ready for combat. Aside from the monsters pay attention to new traps, because there's going to be a lot of them in the area.

Make sure that you've surrounded all smaller rooms, because you'll have to defeat a very powerful abomination in the largest central room. Don't forget to use all the spells you have, as well as good magical weapons. I would also recommend to encourage the beast to chase you, so no one else will join this battle. Once you've defeated the abomination enter the large room for the second time and this time travel to [The Circle tower - Templar quarters] (M34, 4). Continue exploring the tower (M34, 5).

Soon after your arrival in the templar quarters you'll come across a room with a demon and a bewitched templar (M34, 6). You won't automatically trigger a fight with either of them, because you'll have a chance to talk first. You can listen to what the demon has to say and to agree for the coexistence to continue or decide to stop it once and for all. If you choose to break their "relationship" you're in a lot of trouble, because aside from the demon and the templar (both mini-bosses) you would also have to deal with a large group of zombies. Continue exploring the tower and watch out for yet another mini-boss (blood mage).

The next area you'll visit is going to be a very large room where you'll trigger a cut-scene and take part in a "controlled conversation" with the sloth demon (M34, 7). Once again - you don't have to pay too much attention to your answers, because you'll fall asleep and wake up in the [Fade]. Make sure to read the description of Lost in dreams main quest to find out how to get out of the Fade. Once you've safely returned to the tower you'll find yourself standing in the exact same spot from where you were originally taken.

MAKE SURE to examine Niall's body and to pick up the litany of Andralla. Notice that this spell has automatically appeared on your quick actions bar and it should stay there, because you'll want to use it in a few minutes. Choose the only unexplored passageway (M34, 8) and continue heading towards the staircase to the next level. A couple of dragonlings will stand in your way and I would once again recommend using ice spells against them. One of the biggest rooms (M34, 9) is being occupied by two mini-bosses (greater rage demon and greater shade) and they'll take you by surprise, so you'll have to act quickly. Try to eliminate weaker creatures first and prevent the monsters from surrounding you.
When you get to the last room of this level (M34, 10) you'll automatically trigger a conversation with Cullen. He's one of the templars here and he's been trapped inside a magical field. Once you've convinced Cullen that you have good intentions you'll have to make a decision. If you decide to grant Cullen's wish you'll have to kill all the mages. Notice that Wynne will automatically become hostile, even if she's a part of your team. I would recommend convincing Cullen that he's wrong and that the remaining mages should survive. If you can't do that just don't give him any straight answers and it'll be sufficient. Make sure to SAVE your game before using the final staircase to reach [The Circle tower - The Harrowing chamber].
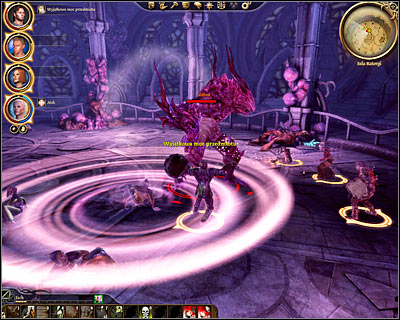
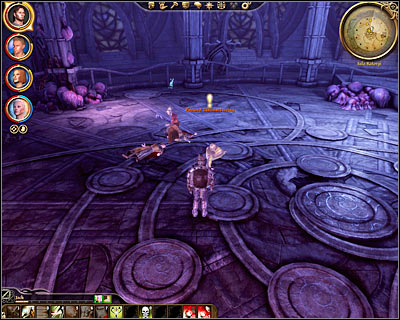
You'll have a chance to talk to Uldred here (M40, 3). It's not going to be a long conversation, because he'll soon transform himself into a beast and a huge boss battle will commence. I would recommend that you start off by eliminating all the abominations found in the chamber, because you'll have to deal with even more monsters soon enough. Once Uldred is the only one standing focus your attacks on him. Don't forget to use the newly acquired litany each time Uldred will try to take control over your team members or over other mages present in the room. Keep your mages and your archers away from Uldred, because some of his attacks are going to be extremely powerful. Use Wynne's abilities to heal your men or even to revive them and don't worry if you use a lot of health potions in the process. This battle will last a few minutes, so you'll have to be patient and avoid making major mistakes.
Once Uldred has been defeated you'll be allowed to talk to the First enchanter Irving. Confirm that you want to leave this area and you'll return with him to the [Circle Tower - Student Quarters] (M33, 1). You'll now have to choose your answers very carefully, because they will affect the final decision made by Greagoir. If you want the templars to take over the tower and to imprison all the mages you'll have to agree with him. If you want the mages to continue their dominance you must convince Greagoir that everything is now under control and that they're no longer a threat. You'll also have to decide what to do with Wynne. Naturally I'd recommend taking her with you, but if you decide that she should stay she'll remain here until you've changed your mind. Don't forget to ask Greagoir for the assistance in the upcoming battle with the Plague and he'll promise to show up on the battlefield.