

Kadingir Sanctum | Walkthrough Doom Guide
Last update: 09 June 2016
Challenges
Dead Man Stalking
Earn 4 Praetor Tokens.
Momentum Swing
Kill 10 demons while using powerups.
You can complete this challenge with Quad Damage which is available during the first battle against Cacodemons.
Sweep the Leg
Perform 4 "Leg Sweep" Glory Kills on the Hell Razer (attack right leg).
You can complete this challenge during the first encounter with the demons.
Find the portal marked by the UAC

Once the level starts, keep going ahead through the only available path. Sometimes you will jump down, sometimes you will climb on the rock ledges. During the march you will have to face hordes of demons. Among them there will be almost all types of monsters and the battle will be long, so watch out so that you won't die at the end. The Mancubuses waiting at the bottom will be most troublesome. You can quickly kill one of them with an accurate head shots with Gauss Cannon and the second with a chainsaw full of gas. Remember to use the proper Glory Kill on the Hell Razer. You must simply stand next to the stunned creature and move the camera at his leg. Once the battle is over, go to the red switch marked by the radar and use it.

You will unlock a passage to the alcove ahead. A yellow skull is hidden inside. This item is the key to the yellow gate marked by the radar.

Behind the door you will find the first Elite Guard and a rock shining in green which is also a Log. After leaving the cave through the other side another battle will start. It is not a simple battle, mostly due to the Summoners and many Hell Knights. Always try to eliminate the Summoners in first order. Homing rockets are most effective against them. The same weapon works well against the knights as well, so you definitely should equip it.
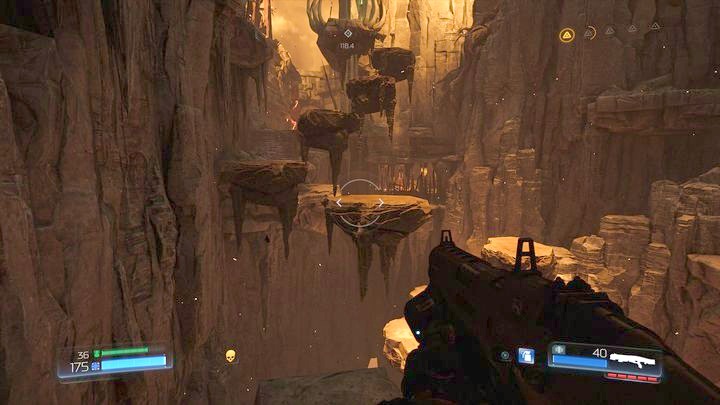
Walk through the gate on the right once the battle is over. Keep going ahead until you reach a large cliff above which soon after a rock platforms will appear. You must jump between them by using the double jump. Before you reach the other side, first climb to the top of the platforms and use the switch that is there. You will open the gate ahead.

Behind it there is a green portal which will take you to a different part of the level. Before you use it, first turn right. At the end of the short path you will find the first collectible (Astroguy).

Once you are teleported through the portal and after picking up a blue skull another battle will start. It won't be too hard in comparison to the previous ones, but watch out for a new enemy type, Cacodemon. These flying, one-eyed beasts can be killed most easily with a rocket launcher. The rocky corner on the left is a good place to fight them. Just remember to keep moving and to check both ends. You should also quickly pick up the Quad Damage flying nearby. It will allow you to complete one of the challenges.

Once the encounter is over, stand on the rock with the chains attached to it. On the opposite side from the yellow door you should notice a piece of rock flying in the air. Jump on it and from there to the edge on the left.

By climbing to the top you will reach the first Rune Trial.
Important! If you try getting there before using the teleport, then the road to the rune will be blocked. It will unlock only after you use the teleportation.
This challenge is quite unordinary. You must reach the altar on the other side of the location. The trouble is, you can move only for few seconds after killing each Imp. Luckily, the beasts will keep appearing in front of you so that you can shoot them with shotgun. During the challenge you must constantly jump from one creature to another. It is best to shoot only when you really close. This will allow you to kill the enemy with a single shot - it is very important since the Super Shotgun has slow reload time. You should change bullets only when running to another demon. For completing the challenge you will receive the Savagery rune which will allow you to perform Glory Kills faster.

Open the blue gate located near the rock with chains after completing the rune.

Inside you should walk ahead, but first it is better to turn to the right and pick up the Argent Cell. Once you leave the tunnel you will be attacked by demons. Quickly kill the weaker opponents on the left and then eliminate the first large beast by using chainsaw. The second beast will appear below and the best way to get rid of it is by using rockets. You will also find a power-up on the lower level.

Jump to the rock platform on the right after eliminating another group of enemies. One opponent on the left and three flying skulls will appear. Quickly eliminate the opponents flying towards you and then jump to the last enemy and kill him from up close. The tunnel on the other side of the fall will lead you one floor higher. There you will be attacked by final beasts, among them a Cacodemon.

Jump between the floating rocks once the opponents are dead. You must reach the red switch with a skull. Using it will open the large gate below.

Go back to the tunnel where you were attacked by the Cacodemon before you walk through the gate. Search the nearby area thoroughly. There is an Elite Guard lying nearby.

Once you pull the valuable item from him, turn around and look down. You should notice a cave entrance.

A new weapon was hidden inside - Machine gun. By walking towards it you will uncover a secret. A new battle will start behind the large gate which you opened recently. It won't be long or requiring. In the tunnel under the entrance you will find a Haste power-up which will make the task easier.

Start searching the location after the battle. Starting from the arena entrance, go along the wall on the left. In the first bypassed niche there will be a teleport which you don't need to use. In the second one there will be an automap.

Go to the opposite end of the location after collecting it. Further route leads up, but first explore the tunnel on the left. Inside you will find a Rune Trial - Seek and destroy. Your task will be to perform three "Death from above" Glory Kills on the Hell Knights. The enemies will appear one after another, so the encounter shouldn't be too hard. Your basic weapon will be a heavy assault gun. It is a good idea to use its upgrade with exploding bullets so that you can quickly weaken the enemy. In order to perform an aerial Glory Kill you can stun the enemy under the stairs and then jump on him from above or do the same with a double jump. During the battle you must remember about collecting ammunition between the new Hell Knights appearing and about killing the weaker enemies in order to heal.

Start climbing upstairs once the challenge is completed. Half the climbing you can turn around and look to the left.

There will be a rock ledge on which a collectible is hidden (RedGuy).

Climb to the top of the stairs after picking the collectible up. Then go to the right. If you walk to the edge of the rock, you should notice a yellow gravity jump below. Land next to it and then go straight.

On the right side you will find an Elite Guard and on the left two Data Logs (one in the form of a runic stone).

Now you can go back to the jump and use it to get back up. You should go to the left from the stairs. On the way you will bypass one more Data Log and a Combat Support Drone.

A hologram will appear once you reach the cave. Follow the displayed characters and then turn right to the path that leads up. At the top of the hill you will see a new demon (Baron of Hell) fighting his kin. If you want, you can wait for the creatures to kill each other and then finish the survivors. You should use machine gun or the rocket launcher on the large beast. After some time two similar beasts will appear. Then it is best to use the quad damage power-up lying nearby.

A gate near the power-up will open after the battle. Before you walk through them, first go to the cave ahead.

There is a lever hidden there that opens the Classic Map.

Entrance to the map can be found by jumping to the right from the bridge that leads to the large gate. It is precisely under the gate. Go forward behind the gate through the only available path. Once you see demons fighting on a rock ledge, kill them from distance, for example with the Gauss Cannon.

Pick up the Data Log after jumping from the last island. Then go up. During the climb you will encounter another Data Log in the form of a runic stone. Slightly further there will be an Elite Guard.

The last Data Log can be found before the final battle of the level. Before it starts you should also pick up the armor and ammunition lying in the tunnel.

The battle will be hard, mostly due to a few barons that appear in the middle of the fight. In order to kill them quickly you should pick up the quad damage on the right. Near it you will find an additional armor as well. Machine gun, Rocket Launcher and Gauss Cannon, weapons which can deal great damage in short time, are very effective against the barons. Remember about using the chainsaw on stronger enemies and to keep moving. Most of all you must avoid being surrounded or nailed to a wall. A Hell Razer will appear early in the battle. You should use him to complete one of the challenges if you haven't done it yet. Remember that you can load the game multiple times if you lack more than one Glory Kill for the challenge. Once the battle is over, keep going ahead to the place with the hologram. Once it disappears you can end the level.