
Archdragon Peak Dark Souls III Guide
Last update: 01 June 2016
Archdragon Peak is one of optional locations that you can travel to only after you have defeated Oceiros, The Consumed King and obtained Path of the Dragon gesture. Use it between dragon statues at one of the chasms in Irithyll Dungeon.
- The beginning
- After the fight with the Ancient Wyvern - return for the items
- After the battle with the Ancient Wyvern - Dragon-Kin Mausoleum
- From the Great Belfry bonfire
The beginning

After you travel to the location, go to the mountains along the only available path. At the tree on the left, there is a Soul of an Exhausted Warrior. A bit ahead, there is the first warrior with a curved blade. Watch out, because he can land an unblockable combo of quick attacks, if you do not block the first strike. Apart from that, his head an slide out, which allows him to attack at a longer distance. Later on, you will encounter opponents with two blades. Watch out while they assume a defensive stance because they can then counter your attacks and deal a lot of damage.
On the right, on a projecting rock, there is a Lightning Gem. Keep to the path and on the left you pass by 2x Homeward Bone. To your right, there also is a lift, but it is useless as of now.

You will get within range of opponents that launch fireballs from above. Come closer and dodge to make the two nearby enemies to come out. Then, deal with them, or lure them below, outside of the range of the projectiles. As soon as you manage to eliminate all of the opponents, you can collect the Titanite Chunk. A bit ahead, you find a bonfire and an Ember.
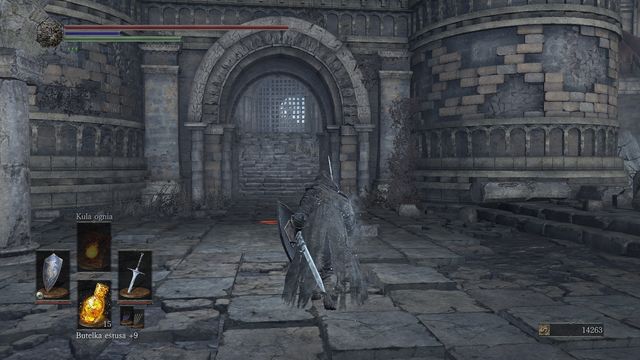
Then, go towards the gate. Before the stone arch, you find a Titanite Chunk (on the left) and a Soul of a Nameless Soldier (on the right). Walk under the archway and go down the stairs before the gate on the left. Watch out for the enemy that appears in the recess on the right. In there, you find a Lightning Clutch Ring.

Now, return to the gate and approach the arch (in front of the stairs, in the corner, there is another Titanite Chunk). Climb up and let the opponent with axe spot you. Drag him down, outside of the reach of fireballs of the other enemy. Mind the swings and fast attacks. Dodge towards the opponent to get behind his back quickly and attack right after he ends his attack. Finally, after you kill him, return up and deal with the last enemy. This way, you will be able to collect the Great shield of the ancient dragon from the body hanging over the arch.
Finally, open the gate and defeat the Ancient Wyvern. It is best, and the fastest, use the attack from above, thanks to which you kill the boss in one blow.
After the fight with the Ancient Wyvern - return for the items

After you defeat the Ancient Wyvern, before you continue the exploration, it is a good idea to return to the bonfire in front of the gate to the arena. Along your path, you can find quite a few items. First of all, in the area where the Wyvern appeared, before the bell, pick up the Large Soul of an Exhausted Warrior. After that, go right, where you find 2x Ember and Dung Pie on the corpses. Stand by the edge barrier and walk around it slowly. While moving along the row of columns to the very end, you will reach a corpse from which you an loot the Ring of Steel Protection.
Return to the bell now and go to the building ruins, just as if you were going to the arena where you killed the Wyvern, by jumping down. Kill the shielded enemy and two other ones. A bit ahead, at the foot of the stairs on the left, you will be attacked by a fireball throwing opponent. Here, you can find a Titanite Chunk and a ladder down (2x Twinkling Titanite).

Then, climb up the stairs and watch out for two enemies that drop down behind you. On top, you will be attacked by two more opponents. Deal with all of them and go left, instead of walking onto the bridge. On the top, you will run into one more opponent and, on the other side, into an opponent with axe. After you kill him, you can collect all the items that he has been guarding: 2x Titanite Chunk and 12x Lightning Bolt.
Finally, cross the bridge and walk around the opponents from afar. The passage behind the shielded opponent takes you to the same one that you have travelled to, after the battle with the Ancient Wyvern. Before you do that, though, climb up the ladder again and walk over the planks to the very end. Jump down. Here, you can climb up another ladder to a wooden platform - follow to the very end of the platform, where you will find 2x Twinkling Titanite.
It is time to return to the Dragon-Kin Mausoleum and continue the exploration.
After the battle with the Ancient Wyvern - Dragon-Kin Mausoleum

After the battle, you will be taken to the area where you can light a bonfire. Then, enter the room, where you will be attacked by a knight (he appears after a moment). Watch out for the swift attacks, especially for those of the swings that he takes a proper stance for - they deal the most damage and the following combo can be difficult to dodge. Also, you can try to lure the knight out into the balcony by the bonfire and push him down into the chasm, with several attacks. After you manage to kill him for the first time, you receive Dragonblood Greatsword.
Note: After you defeat the knight for the first time, you can return for Dragonblood Armor Set. You can find it in the location where you have found Path of the Dragon gesture - in the tomb after defeating Oceiros (travel to Oceiros, The Consumed King bonfire).
Note 2: After you sit in front of the altar, among dragon figurines (use Path of the Dragon gesture), you will receive Ring of Disaster.

It may surprise you a little, but after you defeat the knight, another one will appear. This is the responsibility of the mage on the balcony. Climb up there quickly and kill him. He keeps respawning the knight up until you kill him.
In the corner, behind the mage, there is a lift that will take you down, to the foot of the location. On the right (while you are facing the stairs) you can walk into the balcony to pick up a Titanite Shard. It is a good idea to be careful, while doing that, because it is being guarded by two enemies on both sides and they may push you down. It is best to lean out slightly and hide again, thanks to which they leave their hiding.
The balcony opposite is connected with the bottom part of the mausoleum. At the body, you find a Titanite Shard, and a big lizard downstairs. Watch out, because it can push you out into the chasm with several thrusts. Additionally, it breathes fire. After you defeat it, you can collect another Titanite Shard. Also, for defeating the lizard, you are rewarded with Twinkling Titanite.

After that, return to the mausoleum and walk over to the gate (along your path, pick up Soul of a Crestfallen Knight). Approach it and examine it and you will receive a Dragonslayer Spear. To continue, come down the stairs on the right.
Note: If you cannot pick up the spear on this side, it will be possible to do this after the battle with the final boss of this location - The Nameless King.
You will travel to a corridor full of enemies. It is best to kill them one after another, starting with the one that has been hiding in the second recess on the left. Then, run up to the very end and attract the attention of two opponents without shields. Backtrack into the corridor, just to drag them away from the shielded opponents and kill them there. Then, deal with the shielded enemies.

On the left, there is an opponent with axe who will attack you immediately. Watch out for successive swings. In the corner, there is a ladder that you can climb to the balcony above - from here, you can try to jump onto the enemy and surprise him this way. Apart from that, on the corpse, you find Thunder Stoneplate Ring.
Move on, along the wooden platform. In the room on the other side, there is an escaping lizard - kill it to receive 3x Twinkling Titanite. Open the chest and collect 3x Titanite Shard. Then leave.

There, watch out for the stone lizards that can quickly roll in your direction (do not stand by the edge). Eliminate them and approach the window and collect the Soul of an Exhausted Warrior. At that moment, a dragon should appear in your way. Wait for it to fly away, watch out for the fire and slip between its legs quickly. Climb up. On the last straight, watch out for the stone lizards that will roll down the stairs. If they hit you, they tip you over which exposes you to damage from the dragon. As soon as you pass by, run inside.

Right after you enter into the next room, you can spot a mage at the other side. Just like in the mausoleum, he will be summoning the opponent until you kill him. For this reason, pass by the summoned opponent and run up to the mage in the first place to deal with him. Then, focus on the scantily-clad warrior. He may be not too tough, but he can quickly deal lots of damage to you (his weapon's skill, watch out for his stance). If you are aggressive enough, you should not even let him attack once and eliminate him quickly. For this, you will receive Ricard's Rapier.

After the battle, follow the corridor up ahead outside. Read the notes but do not strike the bell just yet. Instead, walk up ahead a little, towards the Great Belfry bonfire.
From the Great Belfry bonfire

A bit past the bonfire, you will walk out into a big yard (there is a Great Soul of a Crestfallen Warrior in the center). Right now, kill the two nearby opponents and walk a bit ahead, towards the belfry. There, you find a stone lizard and a chest with 3x Twinkling Titanite. You can climb up the ladder here.

On the mountain, by the dragon's corpse, you meet Havel who will be hostile towards you. Seize the opportunity to approach the enemy when he is turned away from you. This will let you land the first blow. Then, dash away from him to a safe distance, because his attacks are lethal and his weapon has quite a range. He combines regular attacks into combos of three, but you can interrupt this attack at the right moment - after the second blow. If you do not want to take the risk, you can wait until the combo ends and then attack. Keep doing that until you drain his entire health bar and do not let Havel strike.
During the fight, Havel may boost his armor (it will then be covered with dark lumps), which makes him nearly invulnerable to attacks. Wait for a moment for the armor to crack and damage dealt by you will return to normal. Havel can still fight with his weapon in one hand. He will often dash towards you and slam the ground, Move away to a relatively long distance, or roll to the side, thanks to which you will be able to reach the enemy quickly after you get up. For winning the battle, you receive Dragon Tooth and Havel's Greatshield. On the dragon, there also is a Tytanite Slab.
Note: After this battle, you can also return to Farron Keep, where you have fought the demon on the bridge (to the Od Wolf of Farron bonfire, take the elevator to the very top). You will then find a corpse at the gate and Havel's Armor Set on it.

Return to the large yard now. At the bottom, across one of the gates (the open one), you will find a locked passage and an Ember next to it. Head up the stairs. You will have to deal with a more numerous group of opponents, including ones with shields and axes. This fight is difficult even if you keep luring enemies out, one by one. This may be burdensome because they are clustered thickly together. It is a good idea to use Hawkwood's help here.

You find the summoning sign after you climb down from the bonfire (by the wall, on the stairs - the screenshot). Summon him and climb up. Let him deal with the majority of the enemies. Deal with marauders and attacks from behind yourself. As soon as you deal with them, head up. Hawkwood will follow. At the end of the path, you find an altar. As soon as the spirit disappears, sit in front of it (the Path of the Dragon gesture), to receive Twinkling Dragon Torso Stone after a while. As you climb back down, right past the first flight of stairs, go right where the big group of opponents used to be. By the ruins, you can enter a narrow path where, apart from a stone lizard, you find Dragonchaser's Ashes.
Note: After you have summoned Hawkwood, who followed you along the Path of the Dragon, return to the Firelink Shrine and talk to blacksmith Andre. He will give you a message from Hawkwood and Hawkwood's Swordgrass. You can duel with him then, in the spot where you have fought Abyss Watchers.

Finally, return to the great bell and ring it, using the lever. After the cutscene, you can walk over the dark clouds and enter the arena, where you fight The Nameless King.
As soon as you defeat the boss, the only thing left to do in this location is collecting the Tytanite Slab right past the bonfire, and the Dragonslayer Armor Set up ahead.