
High Wall of Lothric - from the Bonfire Dark Souls III Guide
Last update: 11 May 2016

After resting, go back to the tower and go downstairs. Defeat two enemies on the way. Go downstairs again to face an enemy with a halberd. Watch out for the attack from behind the head that can hammer you into the ground. Go along the corridor to the next part and watch out for the enemy throwing Firebombs (you will find some Throwing Knives in the corner).

You will find a body at the end of the corridor and a Mail Breaker next to it (watch out for the enemy coming from the left).Go downstairs and you will reach a cell with a prisoner. The door is locked for now, so go back to the tower and leave through the door on the middle floor. You can go back here after obtaining Cell Key.

When you leave the tower, you will find a Soul of a Deserted Corpse on the right. A bit further, near some praying undead, you will find a ladder leading to the rooftops below. You will be attacked by two enemies. Quickly eliminate the first one that will go up the ladder.

In the place shown in the screen, one of the undead will start transforming after you come close to him. Take Firebombs and prepare yourself for a battle. If you want to avoid it, focus on the enemy standing on top of the roof with his hands raised. Run towards him and kill him before he mutates. If you don't manage to do so, fight or run to the edge of the roof, where you can go down the ladder (you will find a Soul of a Deserted Corpse in the body).

Downstairs, you will be greeted by a crossbowman and several other enemies. With the ladder behind you, go to the balcony. Be careful, because a few enemies will show up here. Don't allow them to circle you. Take Firebombs from the body. Head back to the ladder and go right before going inside the building. You will find Black Firebombs near the body. Go inside and go left right away. Quickly kill the enemy hiding behind the wall and the crossbowman (break the urns to unlock the passage and find Undead Hunter Charm).You will find another assassin behind the stairs, so don't get ambushed. Here you will also find a Titanite Shard.

Go back to the main hall and deal with the knight. He fights similarly to the one that you met before, but he wields a spear that he will try to use to pierce you. After the fight, you will find a Soul of a Deserted Corpse in the corner of the room. Go further and turn right, to a corridor. Destroy the barrels and chests to get to the end of the balcony. If you destroy the barrels, you will be able to jump down, but it is better to go back here after clearing the area from enemies. Go back and proceed further. Watch out for the enemy jumping from the left. Search the room where he was. Behind the wheel, you will find a Broadsword. Go outside and head to the next part.

When inside, don't go down right away. Instead, go to the other side. You will find two enemies here and a chest with a treasure - Silver Eagle Kite Shield. After collecting the items, go all the way down. However, do it slowly, trying to lure the enemies out one by one. Most importantly, you should lure out the dog, because these beasts are very quick and can interrupt you as you fight other enemies. Attack another enemy on your right and deal with the remaining two.
Search this place thoroughly. You will find a Cell Key here, an Estus Shard and a Titanite Shard. If you go upstairs (back), towards the passage that was blocked, you will find a few chests at the end. Destroy them and you will be able to jump down. Here, you will find a chest with Astora Straight Sword inside. You can now jump down to the main square. However, it is good to go back and to the prisoner that you met earlier.
Rescuing the prisoner

If you can't remember the way, start from the second Bonfire. Go to the lowest level of the tower (you will go past a few enemies). The corridor on this level leads straight to the prisoner. His name is Greirat. After opening the cell using the key that you've found, you can talk to him. You will receive a mission to carry Blue Tearstone Ring to Loretta, who can be found in the next location - Undead Settlement. Greirat will offer help if you agree to do so.
Large square

Now, head towards the large square on which you will find a huge knight. After going down, the battle will start. You should prepare yourself, because the enemy is very strong and deals a lot of damage. Watch out especially for his whirlwind attack. Jump back early enough. Do the same when you see the enemy summoning lightning. Stay rather close to him and try to rotate with the enemy to attack his back. When you manage to defeat him, you can search the square. You will find two Embers and a Rapier.

Leave through the lowered gate and head right. On the stairs, you will encounter a crossbowman and another enemy to the left of him. Go up the first flight of stairs and head right. You will find a Soul of a Deserted Corpse here. Speed up and jump onto the roof above the square. You will find Ring of Sacrifice. Go upstairs and head right again.

You will encounter a single enemy in the passage. Watch out, because after you kill him, more opponents will appear. Perform a quick dodge or block with your shield to be able to step back. When you clear the square, you can pick up Green Blossom lying in the corner. Follow this path to the end and use the lift. Near the chests, you will find some Throwing Knives. You will see metal bars on the other side. Open them to unlock a shortcut to the first Bonfire.
Path leading to the boss

Lastly, head back towards the square and take the path leading the opposite direction than the previous one. On the bridge, you will find two knights patrolling the area. Your only and best chance to defeat them is to lure one of them towards the stairs, eliminate him and go back to the second one. Fighting them one by one is much easier. You will find another knight on a balcony a little higher. Defeat him and take the Lucerne from the body nearby.

Head towards the chapel and turn left before it. You will encounter an even more powerful knight with a blue cape. Take advantage of the fact that he is facing his back at you and stab him from behind. Attack him for as long as you can, until the enemy gets up and turns around. When this happens, use Firebombs if possible to finish the enemy. Otherwise, you have to be very careful, because the knight deals more damage than other ones. As a reward, you will obtain a Refined Gem.

Go inside the chapel and talk to Emma twice. You will receive Small Lothric Banner and Way of Blue (Covenant).
Note: You can initiate a battle with a boss, the Dancer of the Boreal Valley, much earlier than according to the story progress. In order to do it, during the first encounter with Emma first talk to her and then kill her. Pick up the basin from her body and walk with it towards the altar. A cutscene with the boss will be triggered. However, defeating the Dancer so early in the game will be much harder. You can use NPCs summoned for the battle with Vordt (their summoning signs can be found before entering the arena with Vordt, but you can summon them and go back to the Dancer. If you do it, they won't be available for summoning for the second time).

Lastly, head the opposite direction from the chapel. Downstairs, eliminate the two last enemies and an archer. Notice the balcony located above him. If you'll need to repeat the boss fight, this is the place where you can jump down, going past the knights on the bridge. The arena below is the place of the second boss fight. Your opponent is Vordt of the Boreal Valley.
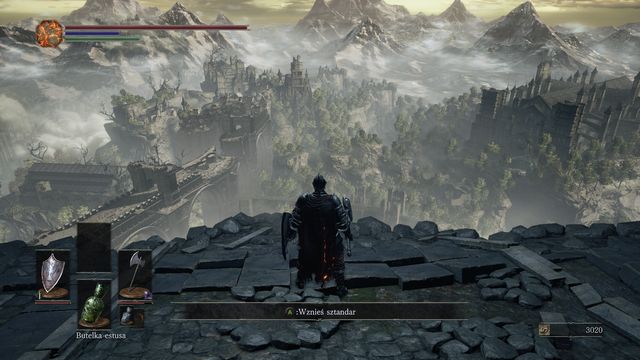
After you defeat him, approach the edge and place the banner here (screen, interact). You will be teleported to Undead Settlement.
Locked door in a tower with Tower on the Wall bonfire
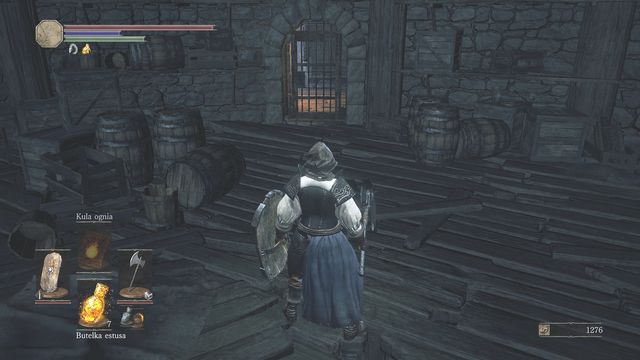
Head to the Tower on the Wall bonfire and get to the bottom of the tower, and use the ladder to get even lower. Turn right and you will find a sealed passage (in front of the corridor that is guarded by enemies) from the screenshot.

To get the key, go to the Cleansing Chapel and talk to Leonhard. You will find him by the highest throne. During the first conversation he will give you 5x Cracked Red Eye Orb. If you obtain Pale Tongue (you can find it e.g. in Undead Settlement, when you help Siegward in the fire demon's area). Leonhard will appear again and will give you Lift Chamber Key that opens the mentioned gate.

Once you get there, you will have to deal with a knight. Take advantage of the situation and approach him slowly, as he is not facing you. Perform a powerful blow and attack once more before he recovers.

During the battle, look out for his long range and deadly thrusts. Move left and right but don't jump backwards. Don't get caught up in a direct combat and watch out for his glistering attack - the knight will try to grab you and drain a significant amount of health. Dodge his attacks and fight back when he hits the floor. Kill him and gain Red Eye Orb.