Darkest Dungeon The Crimson Court: How to beat The Baron? Darkest Dungeon Guide
Last update: 20 April 2023
The Baron is the first "real" boss you will encounter in the Courtyard. You will be fighting him during the second mission of the area, "Morbid Entertainment". The boss itself is not the main issue here, however. The biggest problem is the dungeon that the enemy is residing it. The area is composed of almost a hundred (!) rooms, connected with numerous corridors and filled with dozens of enemies. What's more, you will first need to find a specific key (one of the four "colors" - red, yellow, green and blue) to gain access to the further parts of the area. Fortunately, the dungeon layout is fixed - it's always the same (like in the Darkest Dungeon area). This guide will include complete maps of each Courtyard area - if you have any problems navigating through them, check those chapters.

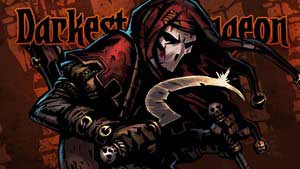
The first of the three bosses of the DLC - the Baron.
Keep in mind that you can always leave the Courtyard area and re-enter it with a fresh party, with a better composition that will be more effective against the boss. There's no point in entering the boss area when most of your characters lost 2/3 of their health and are almost afflicted.
Statistics of the boss
The following table presents the boss' stats during the second mission in the Courtyard, "Morbid Entertainment". The boss doesn't have three different variants (like, for instance, Crocodilian) - you will encounter him only once.
Name | The Baron |
Health | 280 |
Dodge | 22 |
Protection | 10% |
Speed | 10 |
Resistance to Stun | 87% |
Resistance to Blight | 85% |
Resistance to Bleed | 55% |
Resistance to Debuff | 60% |
Resistance to Move | 85% |
Note - the boss has 3 moves each round.
How to defeat the boss
The encounter with the boss starts with the enemy accompanied by three Throbbing Cocoons. Once the fight begins, the boss uses "The First Act" ability, turning himself into an Insect Pod as well and hiding his presence. You now have to attack one of the cocoons to reveal the enemy hidden inside of it - it can be a boss or one of the BLOODSUCKER-type enemies. Once you reveal the boss, the real fight begins. The enemy will use three different attacks during the same round. Fortunately, his attacks are quite weak - the most powerful is Crowd Pleaser, dealing 5-6 points of damage at the maximum. His attacks have extremely low accuracy - increasing the DODGE stat of your heroes is highly advised, as even 40 points will allow them to avoid about half of his attacks.
Keep attacking the boss (and ignore the rest of the cocoons) until you decrease his health to about 75%. When that happens, he will use "The Second Act" attack, turning into a Throbbing Cocoon again and recreating any destroyed cocoons as well. Your task here is the same - you must hit one of the cocoons to reveal the enemy hiding inside. If it's a "regular" foe, kill him and attack the next taget. Repeat the process until you reveal the boss. Bring down the enemy health to about 50% - this will force him to use "The Third Act", hiding inside a Throbbing Cocoon again and restoring any you've managed to destroy.
Attack one of the targets again to reveal the enemy. Keep in mind that this time the cocoons will contain the most powerful enemies of the Courtyard - if you find anything other than the boss, it's crucial to take the foe out before looking for the Baron. Once you reveal the boss, keep attacking him to bring his health down to 0 - there's no "Fourth" act, the boss won't hide again. If you've revealed the boss before destroying all of the cocoons, the enemy might use an attack that will reveal all of the foes hiding inside, making the encounter quite difficult. If that happens, focus all of your attention on the boss to take him out as quickly as possible and then eliminate the remaining enemies one by one.
There's a number of things you should keep in mind while preparing to fight and/or fighting the boss. Those are:
- DO NOT use attacks that target multiple positions. It's a terrible idea to reveal all of the foes at the same time - this will allow up to 4 enemies to attack you simultaneously. It's better to take them out one by one, until you finally reveal the boss himself.
- As long as there's at least one cocoon present on the battlefield, all of the healing abilities will be locked and you won't be able to use them. You can, however, still heal stress damage - unless the ability also restores health.
- The boss moves 3 times during a round, which is why all Bleed and Blight based abilities are extremely effective against him. Hound Master, Flagellant, Jester, Plague Doctor and Abomination are very good choices when planning to face the boss.
- Marking and Stunning the boss is ineffective because of the fact that the foe can move three times during a round.
Recommended team composition for the encounter
By looking at the boss' stats presented in the table you should already have a vision of the effective team composition for the boss in your head. You should target the main weaknesses of the boss - lack of Protection (10%), rather low DODGE (22) and low Blight / Bleed resistances. 3 actions per round can also be used against the enemy - any DoT (Damage over Time) effect is extremely effective against him. The enemy can quite easily shuffle your heroes, which is why you should select those that can act from any position.
The team that will do well against this boss consists of:
- Man-at-Arms in the 1st rank. Man-at-Arms can attack almost any position and act from any spot, but he will be the most effective from the 1st rank. His main task is to use Bolster to increase the DODGE (and SPD) of your party. The Baron has low accuracy - increasing DODGE will allow your heroes to avoid most of his damage and/or stress damage.
- Hound Master in the 2nd and 3rd rank. Hound Masters can use their Hound Rush ability from any position. The ability itself (especially with the Dog Treat bonuses) can deal high damage, apply quite a powerful Bleed and benefits from Marking, if you can apply any. Hound Masters are also self-sufficient - they can heal their wound (if there are no cocoons) and reduce the stress of the entire party. Guard Dog ability is also extremely effective - using it on the 1st and 4th rank will protect heroes located there from any damage and the boost to DODGE will allow the Hound Masters to dodge any attack. They can act from any position, but for this party composition ranks 2 and 3 are the best.
- Occultist in the 4th rank. There's no need for a healer class here, as you won't be able to use any healing abilities most of the time, making the Occultist one of the best choices for the 4th rank. The abilities you want to use are Vulnerability Hex and Weakening Curse. The first one will be used to mark the boss in order to increase the damage of the Hound Masters and it will be effective against the monsters that the boss will summon during the end of the encounter. Weakening Curse will mainly be used against the monsters that accompany the boss - Baron himself does very little damage. It's worth to activate Sacrificial Stab as well, in case the Occultist gets shuffled into the front.
This party composition should be one of the best for the task. Keep using Bolster with the Man-at-Arms - after three rounds this will increase the DODGE of your party by 21-27 points (depending on the level of the ability), as well as boosting their speed by 9-15 points. The additional DODGE, coupled with the DODGE boost you can get from trinkets (+8 from Feather Crystal, +10 from Sun Cloak or +5 from Ancestral Candle) should allow your party members to avoid most (if not all) of the Baron's attacks. Additional speed will also be useful here - it will allow them to move before the enemies that come out of the cocoons. Hound Masters should mainly use Hound's Rush - if you want to mark the enemy, hit him with the Target Whistle (this is also extremely effective against some of the BLOODSUCKER-type enemies that will accompany the boss - some of them have high PROT value), occasionally using Cry Havoc to decrease the stress of your party. Try to use Guard Dog ability every 3 rounds on the Man-at-Arms and the Occultist - this will, literally, turn your party invincible, as the enemy won't be able to hit them. The Occultist should focus on using his two debuffs - Weakening Curse and Vulnerability Hex - all the time.
Heroes that you should avoid using here are:
- Abomination - he can't transform back from his "monster form" (as it heals him), preventing him from using half of his abilities.
- Lepper and Crusader - the Baron can spawn in rank 3 or 4, preventing the Lepper from even touching him. If you, however, have trinkets that will increase the accuracy and damage of the Lepper or the damage and critical change of the Crusader, they are still viable - they might be able to take out two enemies with a single hit. Other than that it's better to use a different hero.
- Vestal - she won't be able to use half of her abilities because of the heal-lock.
- Arbalest - the enemy is likely to shuffle her from the 4th rank into the front, making her completely useless.