login (email): password:
auto log in (cookie) | forgot your password?
all game guides

Crysis - FINAL MISSION – part 4 - game guide, walkthrough, secrets, game tips & strategies

Crysis Game Guide
FINAL MISSION – part 4
by Jacek "Stranger" Halas (guides.gamepressure.com)
Free game guides, walkthroughs, solutions, game FAQs and maps for gamers.
Download this game guide for free in PDF File format.
rate guide:
FINAL MISSION – part 4  (68/76)


Finding the chief engineer


Map legend:

1 – starting area

2 – elevator leading to the lower deck of the ship

Before you decide to proceed with this mission, you should take your time and rearm yourself. Like I’ve already said, you will be able to find a lot of supplies on the flight deck of the ship. I would recommend taking a shotgun and a minigun. Alternatively you could pick up a SCAR rifle instead of a shotgun, however you would have some problems killing larger groups of monsters.


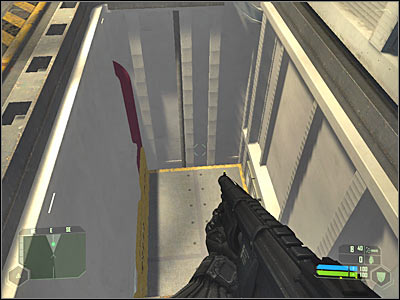
Proceed towards the southern section of the aircraft carrier. Watch out for the large holes. You will have to avoid them, because otherwise you would end up standing in a fiery trap. Approach some of the allied soldiers. Step up to a large platform. It’s an elevator, so you must wait for it to reach a new deck of the ship.
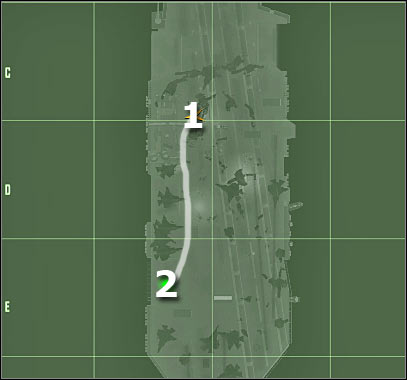


Map legend:

1 – starting area

2 – hole in the ground

You will find yourself near a new corridor. Proceed forward and you’ll eventually come across allied soldiers. There aren’t any monsters here, so you won’t have to be moving slowly. Approach a new hole. This time you’ll want to head down. Don’t worry, because you won’t lose any health points here. Allow the floor to collapse and you’ll end up inside a new area of the ship.
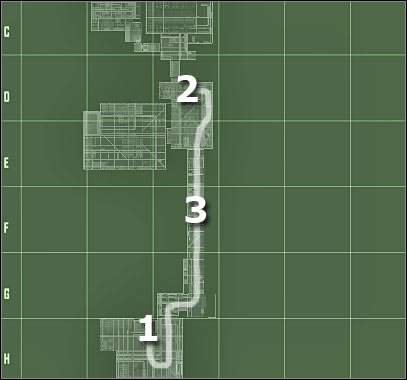
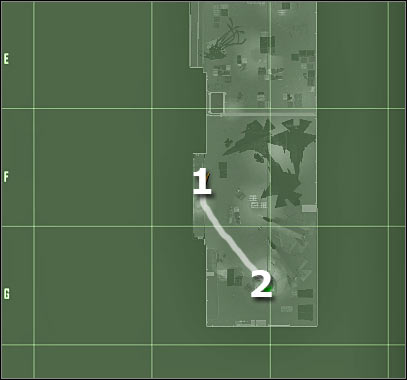


Map legend:

1 – starting area

2 – destination

3 – traps

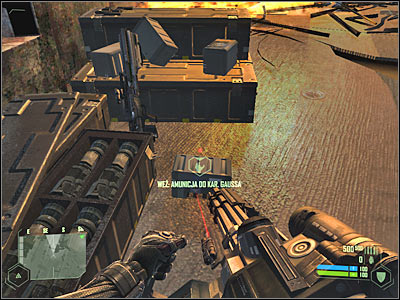
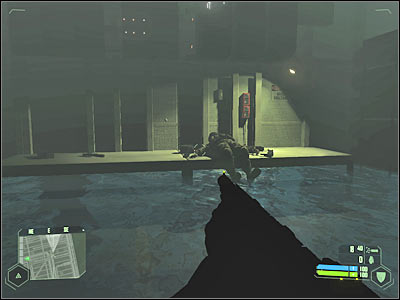
Start moving forward. Just as before, you won’t encounter any alien creatures. First of all, approach the body of a dead soldier. You’ll be able to find a lot of useful items here, including ammunition to your minigun. You should also pick up a couple of grenades.


Now you will have to start moving north. There’s an open doorway here, so you shouldn’t have any problems finding a correct route. Be careful, though. The area is not safe. Approach a new corridor slowly and wait for an explosion to occur. You could also move back a little.


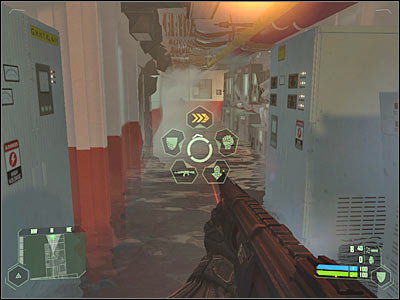
Approach this corridor once again. You will have to avoid a second trap which can be found here (screen). The solution to this problem is very simple. Activate maximum speed and start running forward. Don’t worry if your armor has sustained some damage, because it’ll regenerate quickly. Proceed to a new area of the ship. You won’t encounter any other obstacles along the way.
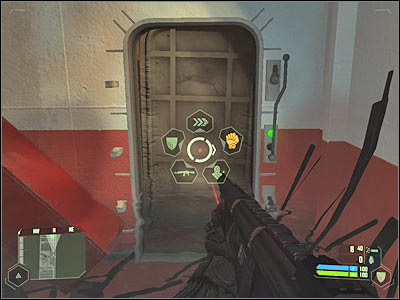


Ignore the stairs, because you won’t have to go there. Instead, approach a nearby door. Activate maximum strength and punch the door in order to be able to move forward. Repeat these actions once you’ve come across a second closed door. Eventually you will team up with a small group of allied soldiers. Make a few steps forward and use the stairs. You will have to talk to chief engineer. He will explain you what has to be done.


FINAL MISSION – part 4  (68/76)
comments and responses

Introduction
Hints & Equipment
Mission 1 – Contact
Mission 1 – part 1
Mission 1 – part 2
Mission 1 – part 3
Mission 1 – part 4
Mission 1 – part 5
Mission 1 – part 6
Mission 1 – part 7
Mission 2 – Recovery
Mission 2 – part 1
Mission 2 – part 2
Mission 2 – part 3
Mission 2 – part 4
Mission 2 – part 5
Mission 2 – part 6
Mission 2 – part 7
Mission 3 – Relic
Mission 3 – part 1
Mission 3 – part 2
Mission 3 – part 3
Mission 3 – part 4
Mission 3 – part 5
Mission 3 – part 6
Mission 3 – part 7
Mission 3 – part 8
Mission 4 – Assault
Mission 4 – part 1
Mission 4 – part 2
Mission 4 – part 3
Mission 4 – part 4
Mission 4 – part 5
Mission 4 – part 6
Mission 4 – part 7
Mission 4 – part 8
Mission 4 – part 9
Mission 5 – Onslaught
Mission 5 – part 1
Mission 5 – part 2
Mission 5 – part 3
Mission 5 – part 4
Mission 5 – part 5
Mission 5 – part 6
Mission 5 – part 7
Mission 6 – Awakening
Mission 6 – part 1
Mission 6 – part 2
Mission 6 – part 3
Mission 6 – part 4
Mission 6 – part 5
Mission 6 – part 6
Mission 6 – part 7
Mission 6 – part 8
Mission 7 – Core
Mission 7 – part 1
Mission 7 – part 2
Mission 7 – part 3
Mission 7 – part 4
Mission 8 – Paradise Lost
Mission 8 – part 1
Mission 8 – part 2
Mission 8 – part 3
Mission 8 – part 4
Mission 8 – part 5
Mission 9 – Exodus
Mission 9 – part 1
Mission 9 – part 2
Mission 9 – part 3
Mission 9 – part 4
Mission 9 – part 5
Mission 10 – Ascension
Mission 10 – part 1
Mission 10 – part 2
FINAL MISSION – Reckoning
FINAL MISSION – part 1
FINAL MISSION – part 2
FINAL MISSION – part 3
FINAL MISSION – part 5
FINAL MISSION – part 6
FINAL MISSION – part 7
FINAL MISSION – part 8
FINAL MISSION – part 9
FINAL MISSION – part 10
FINAL MISSION – part 11
FINAL MISSION – part 12
This site is not assotiated with and/or endorsed by the Electronic Arts or Crytek Studios. You are not permitted to copy any image or info from this page.
All logos and images are copyrighted by their respective owners. Official Crysis www page: http://www.electronicarts.co.uk/
Chronicles of Mystery: The Tree of Life | Dragon Age: Origins | Risen | Divinity II: Ego Draconis | Batman: Arkham Asylum | Fallout 3: Mothership Zeta | ArmA II | Sherlock Holmes vs. Jack the Ripper | Fable II: See the Future | Fable II: Knothole Island | Call of Juarez: Bound in Blood | Fallout 3: Point Lookout | more game guides ...