login (email): password:
auto log in (cookie) | forgot your password?
all game guides

Crysis - Mission 3 – part 1 - game guide, walkthrough, secrets, game tips & strategies

Crysis Game Guide
Mission 3 – part 1
by Jacek "Stranger" Halas (guides.gamepressure.com)
Free game guides, walkthroughs, solutions, game FAQs and maps for gamers.
Download this game guide for free in PDF File format.
rate guide:
Mission 3 – part 1  (17/76)


Disabling a jamming station

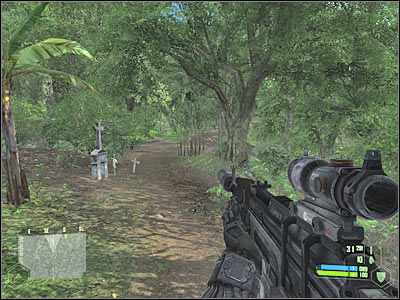
Start off by listening to what Prophet has to say. Unfortunately, he is going to be captured by one of the weird monsters. As a result, you’ll be on your own here. Sadly, you can’t use your map, because there’s a jamming station nearby, similiar to a device found during the course of the first mission of the game. Start moving forward. There’s a small path here (screen).


Keep heading straight until you reach a smaller hill. Look at the screen, because that’s where you should be standing. There’s a large field ahead of you. Try and locate an enemy vehicle. It should be parked to your right. Your main task here will be to neutralize it by taking out the gunner. Once this is done, start shooting at the remaining enemy soldiers. Most of them will appear near the humvee. Additionally, they probably won’t be able to respond to your attacks (only if you’re using a silencer and a cloaking device).


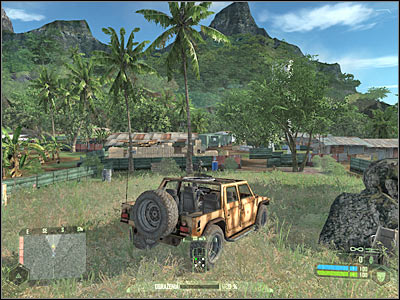
Start moving towards the vehicle. You will have to be careful here, because you might have let someone live. Use a cloaking device just to make sure that you won’t suffer any major injuries. Enter a nearby hut and pick up some ammunition. After that, go back to the car and use it.


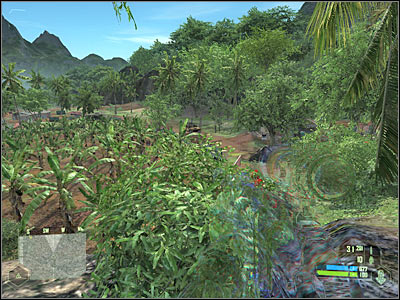
Your task here will be to secure the surrounding area. Thankfully, you’re using a humvee, so it shouldn’t be a problem. Start off by going towards a nearby field (screen). Look around a lot, especially since you can’t use your map. Be careful, because some of the enemy troops may try and surprise you.


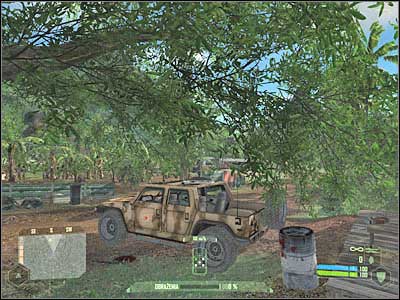
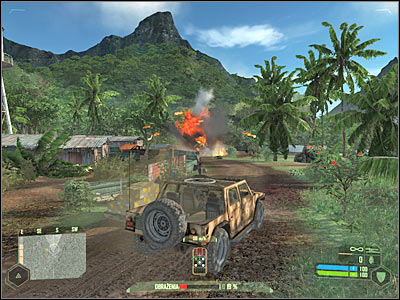
A second humvee should appear in this area very soon. It’s heading your way, so you must act quickly. Use your gun in order to destroy it (screen). Make sure that you’ve killed all enemy units before leaving your car. Start moving towards the buildings. You should be using camouflage here. It would also be a good idea to choose a shotgun from your inventory.


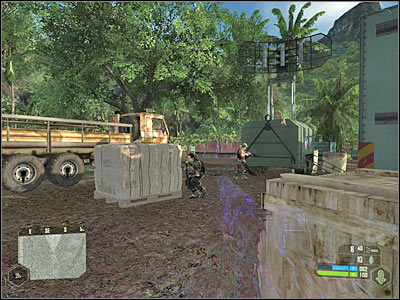
You will have to reach a well known device. Look at the screen, because that’s how your target should look like. I had to deal with three additional soldiers here, so make sure to check the surrounding area before approaching the jamming station. Press the action key in order to disable this device. Your map is going to be activated. Take a look at it, especially since you’re waiting for new orders to pop up on your screen.


Mission 3 – part 1  (17/76)
comments and responses

Introduction
Hints & Equipment
Mission 1 – Contact
Mission 1 – part 1
Mission 1 – part 2
Mission 1 – part 3
Mission 1 – part 4
Mission 1 – part 5
Mission 1 – part 6
Mission 1 – part 7
Mission 2 – Recovery
Mission 2 – part 1
Mission 2 – part 2
Mission 2 – part 3
Mission 2 – part 4
Mission 2 – part 5
Mission 2 – part 6
Mission 2 – part 7
Mission 3 – Relic
Mission 3 – part 2
Mission 3 – part 3
Mission 3 – part 4
Mission 3 – part 5
Mission 3 – part 6
Mission 3 – part 7
Mission 3 – part 8
Mission 4 – Assault
Mission 4 – part 1
Mission 4 – part 2
Mission 4 – part 3
Mission 4 – part 4
Mission 4 – part 5
Mission 4 – part 6
Mission 4 – part 7
Mission 4 – part 8
Mission 4 – part 9
Mission 5 – Onslaught
Mission 5 – part 1
Mission 5 – part 2
Mission 5 – part 3
Mission 5 – part 4
Mission 5 – part 5
Mission 5 – part 6
Mission 5 – part 7
Mission 6 – Awakening
Mission 6 – part 1
Mission 6 – part 2
Mission 6 – part 3
Mission 6 – part 4
Mission 6 – part 5
Mission 6 – part 6
Mission 6 – part 7
Mission 6 – part 8
Mission 7 – Core
Mission 7 – part 1
Mission 7 – part 2
Mission 7 – part 3
Mission 7 – part 4
Mission 8 – Paradise Lost
Mission 8 – part 1
Mission 8 – part 2
Mission 8 – part 3
Mission 8 – part 4
Mission 8 – part 5
Mission 9 – Exodus
Mission 9 – part 1
Mission 9 – part 2
Mission 9 – part 3
Mission 9 – part 4
Mission 9 – part 5
Mission 10 – Ascension
Mission 10 – part 1
Mission 10 – part 2
FINAL MISSION – Reckoning
FINAL MISSION – part 1
FINAL MISSION – part 2
FINAL MISSION – part 3
FINAL MISSION – part 4
FINAL MISSION – part 5
FINAL MISSION – part 6
FINAL MISSION – part 7
FINAL MISSION – part 8
FINAL MISSION – part 9
FINAL MISSION – part 10
FINAL MISSION – part 11
FINAL MISSION – part 12
This site is not assotiated with and/or endorsed by the Electronic Arts or Crytek Studios. You are not permitted to copy any image or info from this page.
All logos and images are copyrighted by their respective owners. Official Crysis www page: http://www.electronicarts.co.uk/
Chronicles of Mystery: The Tree of Life | Dragon Age: Origins | Risen | Divinity II: Ego Draconis | Batman: Arkham Asylum | Fallout 3: Mothership Zeta | ArmA II | Sherlock Holmes vs. Jack the Ripper | Fable II: See the Future | Fable II: Knothole Island | Call of Juarez: Bound in Blood | Fallout 3: Point Lookout | more game guides ...