
The Mad Hatter | Most Wanted Batman: AO Guide
Last update: 11 May 2016
Way to unlock the mission: You get the opportunity to start this optional mission right after you leave the Burnley Sewers, soon after you start the Access the Gotham Merchants Bank main mission.
The beginning of the mission
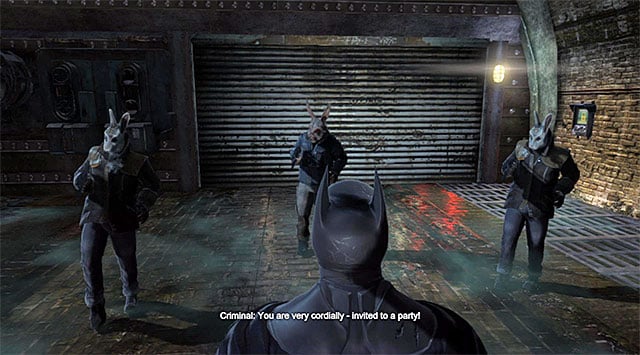
Right after you exit the sewers, i.e. when you return to the Burnley district, you will automatically meet some criminals controlled by the Mad Hatter. Apart from that, you will get the opportunity to listen to the criminal's speech, from which you will learn that he has abducted an innocent woman.
The meeting with the Mad Hatter


You can now go to the shop that belongs to the madman, which is located in the central part of The Bowery district (the above screenshots). Keep vigilant because the region of the entrance to the Mad Hatter's hideout may be patrolled by several regular bandits and, in such a situation, you of course need to deal with them. After you have cleared the area, enter the Hat Shop.

Start by using the claw on the crate located near the ceiling and run up to the wall, so that Batman can jump into the shaft. Walk through the shaft and, after you reach the room with the Mad Hatter in it, start attacking his goons. They should not be too demanding, although you should not let yourself be cornered. After the fight, approach the Hatter and press the interaction key/button.
Get out of the nightmare

After you end up in the "Wonderland", go ahead. Do not attempt to catch up with the Hatter t any cost, especially that you will encounter traps along your way. You need to avoid contact with the discharges and run, at the right moment, through the areas in which they appear.

Stop before the plate which, comes under power at regular intervals. Wait for the discharges to disappear, run up to the edge and throw several batarangs, thanks to which they will hit the lampoons on the right (the above screenshot). Retreat quickly to prevent getting an electric shock. Wait for the discharges to disappear again and try again. Keep repeating this actions until you hit all six lampoons, which will lower the drawbridge.

You can resume along your path and jump towards the edge at the end. Shimmy to the right as far as you can, and drop down only them. Keep climbing onto the successive ledges to reach an area with three doors in it. You always need to pick the doors at which you can see the Hatter's helper, so: the right, the left, the left.

If you have done everything according to the plan, you will make it into a new location, where there is a big mirror. Be prepared to fight a long fight hare so, you should avoid losing your health points too often, because you might not live to see the end of the fight otherwise. I especially mean the enemies with knives here, which, as it is usually the case, should be eliminated in the first place. After you have dealt with all of the opponents, take the door to the next area.

Go right and focus on avoiding the discharges again. Also here, you will have to coordinate a few actions. Wait until the discharges disappear at the last plate, run up to the wall on the right (the screenshot) and spread the over it the explosive gel. Jump away and detonate the charge. This will unlock your passage to the next location.

Mount the small floating platform and select the claw from the inventory and aim it at the interactive point in the central part of the river. After you pull yourself to this point, use the claw again, this time to make it over safely to the other bank. Leave this area and, after you get to another location, grab onto the ledge and shimmy to the right. After you get to a small ledge, crouch and walk in this position along the narrow tunnel.

Take the ladder and walk onto the rope here. Press the key/button suggested by the game, thanks to which Batman will slide down the rope and, as a result, ram through the obstacle that you can see in the distance. After you land, move quickly towards the exit that you can see in the distance, because fragments of the bridge will soon start to fall off. Perform a single jump and walk through the door, which will take you into a tower with a multitude of operating cogs.

First of all, select the grapple from the inventory and use it to extend the rope above the spot where your character is staying. Make it onto the rope using the hook and jump down onto the ledge located a bit under it. Interact here with the device that controls the operation of the entire machine in order to sabotage it.

You can now continue climbing up with the use of the grapple on one of the anchor points located above. Use the hook to reach a new rope and glide towards the exit from this location. After you get into a new place, take the ladder and stop at the edge. Wait until the moment is right and jump. Walk over the rope and wait again for the right moment to jump.

Climb onto the ledge above and open the door. After you reach a new area, use the hook on the interactive mechanism above and wait for it to come down. You can now use the hook once again, this time to reach the opening in the ceiling that has been inaccessible so far. The only thing left for you to do is walk over several horizontal pipes, which will take you to the manhole. This will conclude this scene.
Neutralize the Mad Hatter

What is interesting, you are not going to fight any rightful battle with the Mad Hatter, because to defeat him, you are going to use the Reverse Batarang awarded to you by the game. Start by aiming at the madman and hold down the key/button that the game instructs you to. Release the button only after the targeting process finishes . You only need to watch the final cutscene here and leave the Hatter's shop.
[New Character Profile: The Mad Hatter]
[New Character Trophy: The Mad Hatter]
[New Concept Art: The Mad Hatter]